
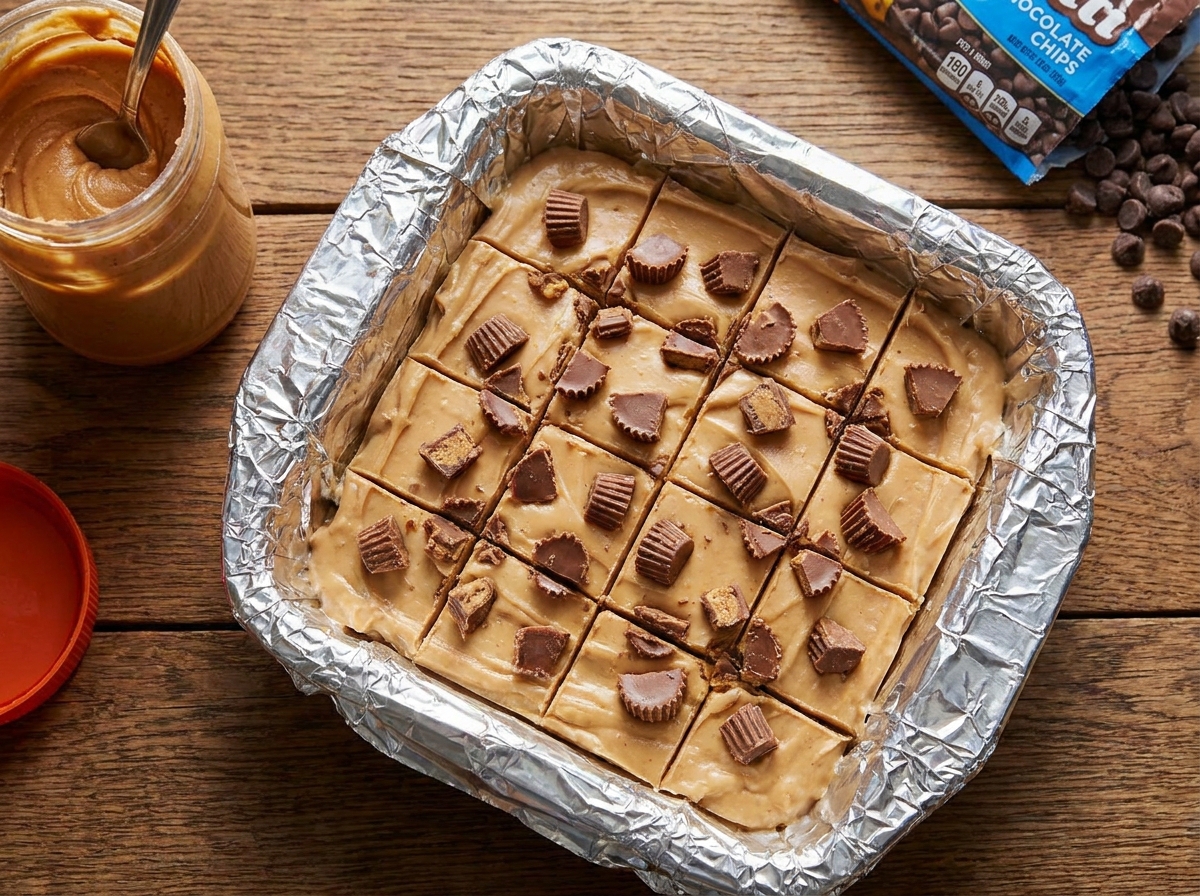
2-Ingredient Reese’s Peanut Butter Fudge
Reese’s Peanut Butter Chips and sweetened condensed milk melt together into a rich, creamy fudge with classic peanut butter and chocolate flavor, no candy thermometer required.
Thank you for reading this post, don't forget to subscribe!
This rich and creamy Reese’s Peanut Butter Fudge takes just two ingredients and a few minutes to prepare. It’s an easy no-bake treat with classic peanut butter and chocolate flavor, made from a bag of Reese’s Peanut Butter Chips and a can of sweetened condensed milk, melted together until glossy and smooth.
There’s no candy thermometer to babysit, no butter to cream, and no need to stand over a stovetop stirring a hot sugar syrup to the exact right stage. Everything happens in a microwave-safe bowl in thirty-second bursts, and once the mixture is smooth, it goes straight into a lined pan to firm up in the refrigerator. What comes out a few hours later slices into dense, fudgy squares with the unmistakable flavor of a peanut butter cup, but with a texture that’s closer to a classic fudge than a candy bar.
It’s the kind of recipe that looks like it took real effort, chocolate and peanut butter swirled together, cut into neat little squares, but the truth is it’s about as low-effort as a homemade dessert gets.
Why This Recipe Works
Sweetened condensed milk is the secret behind almost every simple, foolproof fudge recipe, and this one is no exception. Unlike regular milk, sweetened condensed milk has already had most of its water removed and a large amount of sugar dissolved into what’s left, which means it doesn’t need to be cooked to a precise temperature the way a traditional fudge made from granulated sugar, butter, and milk does. Once it’s warmed and combined with melted peanut butter chips, the sugar in the condensed milk is already in a stable, dissolved state, so the mixture simply firms up as it cools rather than needing to be cooked to the soft-ball stage on a candy thermometer.
Reese’s Peanut Butter Chips bring both the peanut butter flavor and a portion of the fat and structure that a traditional fudge would get from butter. Because these chips already contain sugar, oil, and peanut butter blended together in a stable form, they melt smoothly into the condensed milk without seizing or turning grainy, as long as they’re heated gently and stirred often.
Why the Microwave Method Is So Reliable
Melting the two ingredients together in short microwave bursts, rather than over direct stovetop heat, gives you far more control over the process and makes it nearly impossible to scorch the mixture. Because the peanut butter chips can seize or turn grainy if they get too hot too quickly, working in thirty-second intervals and stirring thoroughly after each one keeps the temperature rising gradually and evenly throughout the bowl.
What You’ll Need
- 1 (10 oz) bag Reese’s Peanut Butter Chips
- 1 (14 oz) can sweetened condensed milk
That’s the entire list. This recipe makes about 20 small squares, at roughly 150 calories per square.
A Note on Ingredient Substitutions
Reese’s Peanut Butter Chips are specifically formulated to melt smoothly and hold their peanut butter flavor once set, so they’re worth seeking out by name rather than substituting a generic peanut butter chip, which can behave differently when heated. Similarly, sweetened condensed milk is not interchangeable with evaporated milk; the two look similar on the shelf but evaporated milk contains no added sugar and won’t set into fudge on its own.
Equipment You’ll Need
An 8-inch square baking pan lined with parchment paper is essential here, since it gives the fudge a clean, easy release once it’s firm. A microwave-safe mixing bowl and a rubber spatula for stirring between intervals round out everything you need; there’s no mixer, saucepan, or thermometer required for this recipe at all.
How to Make It
- Line the pan. Line an 8-inch square baking pan with parchment paper, leaving some overhang on the sides for easy removal later.
- Combine. Add the Reese’s Peanut Butter Chips and sweetened condensed milk to a microwave-safe bowl.
- Microwave in intervals. Microwave in 30-second intervals, stirring well after each interval, until the mixture is completely melted and smooth.
- Pour into the pan. Pour the mixture into the prepared pan and spread it evenly with a spatula.
- Refrigerate. Refrigerate for 2 to 3 hours, or until firm to the touch.
- Slice. Lift the fudge from the pan using the parchment paper overhang and cut into small squares.
Getting a Smooth, Glossy Fudge
Stirring thoroughly after every single microwave interval, rather than just at the end, is what keeps this fudge smooth instead of grainy. The chips at the bottom of the bowl tend to melt faster than the ones near the top, so working them back into the mixture with each stir ensures everything melts evenly rather than some pieces overheating while others stay solid.

Getting the Right Set
This fudge needs a full 2 to 3 hours in the refrigerator to firm up properly, and rushing that chill time is the most common reason a batch turns out too soft to slice cleanly. The center of the pan takes the longest to set, so it’s worth pressing gently in the middle before cutting to confirm the fudge feels firm all the way through, not just around the edges.
Knowing When It’s Done Melting
The mixture is ready to pour once it looks completely smooth and glossy, with no visible chip pieces remaining and no graininess when you run the spatula through it. If small lumps remain after a few intervals, give it one more 15 to 20 second burst and stir again rather than assuming they’ll dissolve on their own once poured into the pan.
Tips for Perfect Peanut Butter Fudge
Use the full 10-ounce bag of chips and the full 14-ounce can of condensed milk as written; this ratio is what gives the fudge its dense, sliceable texture, and even a modest change in proportions can leave it too soft or too firm. Let the fudge sit at room temperature for a few minutes before serving if you’d like a softer, creamier bite, since it firms up quite a bit straight from the refrigerator.
Troubleshooting Common Issues
My fudge is grainy. This usually means the mixture got too hot too quickly; stick to short microwave intervals and stir thoroughly between each one next time.
My fudge won’t set. Make sure you used a full 14-ounce can of sweetened condensed milk rather than evaporated milk, and give it the full chill time before checking.
My fudge stuck to the pan. Be sure to line the pan with parchment paper and leave enough overhang on the sides to lift the whole block out at once.
My squares are crumbling apart. The fudge likely needs more time to chill; a fully set fudge should hold together cleanly when sliced with a warm, clean knife.

A Few Ways to Make It Yours
Chopped Peanut Butter Cups
Fold in chopped peanut butter cups before chilling for extra bursts of chocolate and peanut butter in every bite.
Flaky Sea Salt
A light sprinkle of flaky sea salt over the top before chilling adds a nice contrast to the sweetness.
Chocolate Swirl
Swirl a few tablespoons of melted chocolate through the top before chilling for a marbled look.
Chopped Roasted Peanuts
A scatter of chopped roasted peanuts over the top adds crunch and reinforces the peanut butter flavor.
The plain version is worth trying first so you know the baseline flavor before adding any extras.
How to Store Peanut Butter Fudge
Store the fudge covered in the refrigerator for up to 1 week, keeping it in an airtight container or well wrapped to prevent it from drying out or picking up flavors from other foods nearby. It can also be layered between sheets of parchment paper in a container for easy grab-and-go squares.
When to Serve This Fudge
This fudge works well as a simple homemade gift, a quick contribution to a holiday dessert tray, or a make-ahead sweet to keep on hand for whenever a peanut butter craving hits. Its small, dense squares also make it an easy option for a bake sale or a potluck, since it holds up well at room temperature for the length of most gatherings.
Nutrition and Serving Information
The recipe estimates approximately 150 calories per square when the pan is cut into 20 small squares, based on standard measurements for Reese’s Peanut Butter Chips and sweetened condensed milk. This is only an estimate, since exact calorie and fat content will vary depending on the specific brands used. Because this recipe is built around peanut butter and dairy, it isn’t appropriate for anyone with peanut or dairy allergies.
Make-Ahead Tips
This fudge can be made several days ahead and stored covered in the refrigerator, making it a convenient make-ahead treat for a holiday or a gathering. Because it needs a full chill time to set anyway, it’s naturally suited to being prepared well before you plan to serve it.
The Science Behind No-Cook Fudge
Traditional fudge relies on cooking a mixture of sugar, butter, and milk to a precise temperature, which controls the size of the sugar crystals that form as it cools and determines whether the finished fudge is smooth or grainy. Sweetened condensed milk sidesteps that entire process because its sugar has already been dissolved into a stable, concentrated syrup during manufacturing. When it’s simply warmed and combined with melted peanut butter chips, there’s no new crystallization to manage; the mixture just needs to cool and firm up, which is why this method is so much more forgiving than a stovetop fudge recipe.
Portioning and Yield
This recipe makes about 20 small squares from a single 8-inch pan, a good yield for a gathering or a couple of weeks of an occasional treat. If you’d like a larger batch, doubling the recipe into a 9×13-inch pan works well, though the chill time may need to extend slightly given the greater depth of the fudge.
A Little Bit of History
Fudge made with sweetened condensed milk became a home-kitchen staple in the mid-twentieth century, once canned condensed milk made it possible to skip the fussy candy-thermometer method entirely. Peanut butter and chocolate as a flavor pairing has its own long history, most famously in the peanut butter cup, and combining the two into a simple fudge brings that familiar candy-counter flavor into a dessert that takes only minutes of hands-on effort.
Serving Suggestions
Serve the fudge chilled straight from the refrigerator for the firmest, most sliceable texture, or let it sit out for a few minutes beforehand if you prefer a softer bite. A few squares arranged on a small plate alongside other holiday treats makes for an easy, low-effort dessert spread, and the fudge also travels well if you’re bringing it somewhere as a gift or a potluck contribution.
Choosing the Right Peanut Butter Chips
Reese’s Peanut Butter Chips are worth using specifically here, since they’re formulated to hold their shape and flavor through melting in a way that a generic store-brand chip may not replicate exactly. If a specific brand isn’t available, look for a peanut butter chip with a similar ingredient list, since chips made mostly of sugar and oil with very little actual peanut butter can melt into a thinner, less flavorful fudge.
Why This Recipe Is So Beginner-Friendly
If you’ve never made fudge before, this is about as forgiving a place to start as you’ll find. There’s no candy thermometer to read precisely, no risk of overcooking a sugar syrup past the right stage, and no need to time anything down to the second. With only two ingredients and one simple technique, microwaving in short bursts and stirring in between, there’s very little room for the kind of small mistakes that can ruin a more complicated fudge recipe. This makes it a genuinely approachable treat for a first-time cook or a child who wants to help measure and stir, since the process is simple, safe, and has real, visible results within a few hours.
Adjusting the Flavor to Your Taste
As written, this fudge gets its entire flavor from the peanut butter chips and the condensed milk, giving a result that’s rich and distinctly peanut buttery with a subtle chocolate note from the chips themselves. If you’d like a more pronounced chocolate flavor, swirling in a few tablespoons of melted chocolate chips before the fudge sets adds a marbled look along with extra richness. A pinch of salt folded into the warm mixture before pouring can also sharpen the peanut butter flavor and cut some of the sweetness. Because this fudge has so few ingredients to begin with, small additions tend to have an outsized effect on the final flavor, so it’s worth trying the plain version first before deciding what, if anything, you’d like to add.
Pairing This Fudge With Other Desserts and Drinks
Because the flavor here is rich, dense, and distinctly peanut buttery, this fudge pairs naturally with lighter, brighter options if you’re serving more than one dessert. A simple fruit salad or a citrus-based dessert cuts through the richness nicely, while something equally indulgent like a chocolate cake leans further into the same direction if that’s the mood you’re after. On the drink side, this fudge is a natural match for a cold glass of milk, the classic pairing for anything peanut butter and chocolate, while coffee works well for an afternoon treat. If you’re building out a larger dessert spread, this fudge reads as one of the richer, more filling options, so balancing it with something lighter helps the whole table feel varied rather than one-note.
A Note on Ingredient Proportions
The ratio of peanut butter chips to condensed milk in this recipe was chosen carefully, and it’s worth understanding why before making adjustments. One full 10-ounce bag of chips to one full 14-ounce can of condensed milk gives enough sugar and fat structure to set into a dense, sliceable fudge, while the peanut butter chips provide enough flavor and body to keep that structure from tasting like plain sweetened milk. If you use fewer chips relative to the condensed milk, the fudge may not set firmly enough to hold its shape when sliced; if you use more chips without adjusting the condensed milk, the mixture can turn thick and difficult to pour evenly into the pan. This particular ratio is what gives the fudge its dense, glossy, sliceable texture rather than either a soft, underset center or an overly stiff, crumbly one, so it’s worth treating the stated proportions as a tested baseline.
A Quick Note on Serving Temperature
This fudge is good served cold, at room temperature, or slightly softened, which is part of what makes it such a flexible treat to have on hand. Served straight from the refrigerator, the fudge is at its firmest and cleanest to slice, which is ideal if you’re prepping it ahead for a gathering. Left out at room temperature for a few minutes, the texture softens noticeably and the peanut butter flavor becomes more pronounced, so it’s worth trying both ways to see which you prefer.
Why This Recipe Is Naturally Kid-Friendly to Make
Because this recipe involves no stovetop cooking and no hot sugar syrup to manage, it’s a genuinely safe fudge recipe to make with kids, provided an adult handles taking the bowl in and out of the microwave. Measuring the two ingredients, stirring between intervals, and spreading the mixture into the pan are all simple, hands-on tasks that give a real sense of accomplishment once the finished fudge comes out of the refrigerator looking like something from a candy shop.
A Quick Note on Portion Control
Because this fudge is dense and rich, a small square goes further here than it would with a lighter, airier dessert. Cutting the pan into 24 smaller pieces rather than 20 standard squares is an easy way to stretch the batch a bit further for a larger gathering, while still giving everyone a satisfying, full-flavored taste of the peanut butter and chocolate.
Common Questions
Can I use a different brand of peanut butter chips?
Yes, though Reese’s chips are specifically formulated to melt smoothly and hold their flavor, so results may vary slightly with another brand.
Can I use evaporated milk instead of condensed milk?
No, evaporated milk contains no added sugar and won’t set into fudge; sweetened condensed milk is essential to this recipe.
Why is my fudge grainy?
This usually means the mixture overheated too quickly; use short microwave intervals and stir thoroughly between each one.
How long does this fudge need to chill?
Plan on 2 to 3 hours in the refrigerator, or until the fudge feels firm all the way through when pressed in the center.
Can I double this recipe?
Yes, use a 9×13-inch pan and double both ingredients, allowing a bit more chill time for the deeper batch.
How should I store leftovers?
Keep the fudge covered in the refrigerator for up to 1 week, layered with parchment paper if stacking pieces.
Can I freeze this fudge?
Yes, wrap the squares tightly and freeze for up to 2 months; thaw in the refrigerator before serving.
2-Ingredient Reese’s Peanut Butter Fudge turns a bag of peanut butter chips and a can of condensed milk into a rich, dense treat with almost no effort at all. Melt, pour, chill, and slice, that’s the entire process, and the result tastes just like the peanut butter cup flavor it’s named for.