
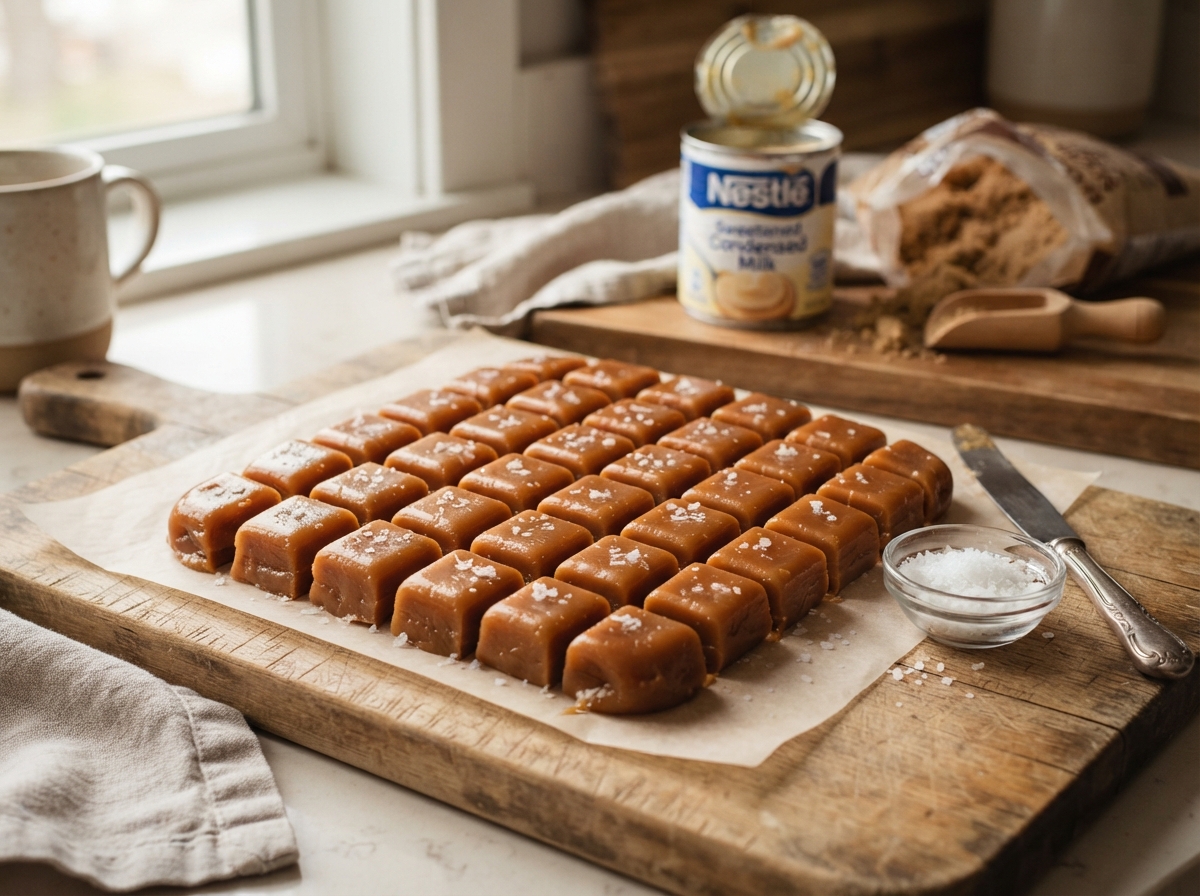
2-Ingredient Condensed Milk Caramels
Sweetened condensed milk and sugar, cooked gently on the stovetop, set into rich, chewy homemade caramels.
Thank you for reading this post, don't forget to subscribe!
These easy homemade caramels are rich, chewy, and wonderfully creamy, made with just two simple ingredients. There’s no candy thermometer required, just a steady hand with a spatula and a little patience at the stove.
Cooking sweetened condensed milk and sugar together slowly over medium-low heat transforms two pale, simple ingredients into a thick, glossy, deep amber caramel. Poured into a pan and chilled until firm, it cuts into chewy squares that taste like something from a candy shop counter.
It’s a perfect sweet treat for a holiday gift tin, a homemade candy platter, or any time you want to make real caramel without the fuss of a thermometer.
Why This Recipe Works
Sweetened condensed milk is already thick and rich with milk sugars, and cooking it together with granulated sugar over gentle heat triggers the same browning reaction that gives traditional caramel its deep color and flavor. Stirring constantly as the mixture cooks is what keeps the sugars from scorching while they slowly transform into caramel.
Because the condensed milk and sugar together provide all the fat, sugar, and milk proteins this candy needs, there’s no butter, no corn syrup, and no candy thermometer required at all, just a careful eye and a willingness to stir.
Why Constant Stirring Matters
Stirring the mixture constantly as it cooks keeps the sugars evenly distributed and prevents them from settling and scorching against the hot bottom of the pan. This is the one step in the whole recipe where patience truly pays off, since a few unstirred seconds can leave scorched bits throughout an otherwise perfect batch.
What You’ll Need
- 1 can (14 oz) sweetened condensed milk
- 1 cup granulated sugar
You’ll also need a heavy-bottomed saucepan and an 8-inch square pan lined with parchment paper. This recipe makes 20–24 caramels, approximately 95 calories each.
A Note on Ingredient Choices
A good-quality sweetened condensed milk gives these caramels their richest flavor and smoothest finished texture. Standard granulated sugar works perfectly here, and there’s no need for anything fancier, since the condensed milk is really what carries the flavor.
Equipment You’ll Need
A heavy-bottomed saucepan, a heat-resistant spatula, and a parchment-lined 8-inch square pan are all you need; no candy thermometer required.
How to Make It
- Prep the pan. Line an 8-inch square baking pan with parchment paper and lightly grease it.
- Combine. Add the sweetened condensed milk and sugar to a heavy-bottomed saucepan.
- Cook. Cook over medium-low heat, stirring constantly with a heat-resistant spatula.
- Watch for color. Continue cooking until the mixture becomes thick, glossy, and golden caramel-colored, about 15–20 minutes. Be careful because the mixture will be very hot.
- Pour. Pour the caramel mixture into the prepared pan and smooth the top.
- Cool, then chill. Let it cool completely at room temperature, then refrigerate for 1–2 hours until firm.
- Serve. Cut into small squares and serve.
Reading the Caramel’s Color
Watching for a deep, even golden-amber color, rather than relying on timing alone, is the best way to judge when this caramel is ready, since stovetop heat can vary quite a bit between kitchens. The mixture should also look noticeably thicker and coat the spatula rather than dripping off quickly.

Getting an Even Pour
Pouring the hot caramel into the pan and smoothing it quickly with a spatula before it starts to firm up gives you caramel of consistent thickness, which means every square sets and cuts the same way. Working carefully here matters, since the mixture is very hot straight off the stove.
Knowing When It’s Done
This caramel is ready to cut once it feels firm but still gives slightly when pressed, holding a clean edge without crumbling. If it still feels too soft after 2 hours in the refrigerator, give it another 30 minutes to firm up further.
Tips for Perfect Condensed Milk Caramels
Use a heavy-bottomed saucepan, since a thin one is more prone to hot spots that can scorch the sugar before the rest of the mixture catches up. Stir constantly and never walk away from the stove while this caramel cooks, even for a minute.
Troubleshooting Common Issues
My caramel has scorched bits. The heat was likely too high or the stirring wasn’t constant enough; use medium-low heat and stir the whole time next time. My caramel is too soft to cut. It likely needs a little longer cooking time on the stove, or more chilling time in the refrigerator. My caramel is too hard and brittle. It was likely cooked a bit too long; pull it from the heat slightly earlier next time. My caramels are sticking to the parchment. Make sure the pan is lightly greased in addition to being lined, and use a lightly greased knife to cut the squares.
A Few Ways to Make It Yours
Sea Salt Caramels
Sprinkle flaky sea salt over the top right after pouring for a classic salted caramel finish.
Vanilla Caramels
Stir in a splash of vanilla extract once the caramel is off the heat for a warmer, rounder flavor.
Chocolate-Dipped Caramels
Dip the cut squares halfway into melted chocolate for a two-toned treat.
Cinnamon Caramels
Stir a pinch of cinnamon into the mixture while it cooks for a warm, spiced version.
The classic version is worth trying first so you know the baseline flavor before adding any extras.
How to Store Condensed Milk Caramels
Store the caramels in an airtight container at room temperature for up to a week, or refrigerate them for longer storage. Wrapping each piece individually in small squares of parchment or wax paper, twisted at the ends, keeps them from sticking together in storage.
When to Serve These Caramels
These caramels work well for holiday gift tins, candy platters, or any time a homemade sweet feels like the right gesture. They also make a lovely addition to a cookie exchange or a care package, since they travel and store so well.
Nutrition and Serving Information
The recipe estimates approximately 95 calories per caramel when the batch makes 20 to 24 pieces, based on standard measurements for condensed milk and sugar. This is only an estimate, since exact calorie content will vary depending on the specific brands used and how large each piece is cut. Because this recipe contains dairy, it isn’t appropriate for anyone avoiding dairy products.
Make-Ahead Tips
These caramels are a genuinely good make-ahead treat, since they need time to cool and chill before cutting, and they hold their texture beautifully for a week or more afterward. Making a batch several days before a holiday or gift-giving occasion removes any last-minute pressure entirely.
The Science Behind Stovetop Caramel
Cooking sugar and the milk sugars already present in condensed milk together over gentle heat triggers the Maillard reaction and caramelization, the same browning chemistry responsible for traditional cooked caramel’s deep color and complex flavor. Because the condensed milk already contains concentrated milk proteins and fat, there’s no need for any added butter or cream; the slow stovetop cooking does all the work of developing that classic caramel flavor and chewy texture.
Portioning and Yield
This recipe makes 20 to 24 caramels from a single batch, depending on how large each square is cut, a good amount for a gift tin or a couple of weeks of treating yourself. Doubling the ingredients works well for a larger batch in a 9×13-inch pan, though the cooking time on the stove will need to be extended since there’s more liquid to reduce.
A Little Bit of History
Caramel candy has a long tradition of being made by slowly cooking sugar and dairy together on the stovetop, a method that predates the candy thermometer by generations and relied entirely on color, smell, and texture as the cook’s guide. This condensed milk version leans on that same traditional technique while simplifying the ingredient list down to just two, making a candy that once required real skill far more approachable for a home cook.
Serving Suggestions
Serve these caramels at room temperature for the classic chewy bite, or chilled if you prefer a slightly firmer texture. A small dish of them alongside coffee or tea makes for an easy, elegant after-dinner treat.
Choosing the Right Pan
A heavy-bottomed saucepan distributes heat more evenly than a thin one, which matters a great deal here since the sugar mixture can scorch quickly in spots where the pan heats unevenly. A pan with tall enough sides to prevent the hot mixture from splattering out during vigorous stirring is also worth choosing.
Why This Recipe Is So Beginner-Friendly
If you’ve never made caramel before, this is a more forgiving place to start than you might expect. There’s no candy thermometer to manage and no precise sugar-stage terminology to memorize, just a visual cue of color and thickness to watch for while stirring constantly. With only two ingredients and a handful of simple steps, there’s very little room for the kind of mistakes that can derail a more traditional caramel recipe. This makes it a genuinely approachable recipe for a first-time candy-maker, since the process is straightforward and produces a real, visible result within about an hour and a half.
Adjusting the Flavor to Your Taste
As written, these caramels get their flavor almost entirely from the deep, toasty notes created as the condensed milk and sugar cook together, giving a rich, classic caramel taste. If you’d like a more rounded, warmer flavor, a splash of vanilla extract stirred in once the caramel is off the heat adds real depth. If you’d prefer something with a little edge, a sprinkle of flaky sea salt on top cuts through the sweetness nicely. Because this recipe has so few ingredients to begin with, small changes tend to have a noticeable effect on the final flavor, so it’s worth trying the classic version first before deciding what, if anything, you’d like to change.
Pairing These Caramels With Other Desserts and Drinks
Because the flavor here is rich, chewy, and deeply sweet, these caramels pair naturally with lighter options if you’re serving more than one dessert, since the contrast keeps a spread from feeling too heavy. A crisp, light cookie or a fruit-based treat balances the richness of these caramels nicely, while a chocolate dessert leans further into the same indulgent direction. On the drink side, these caramels pair well with black coffee, tea, or a glass of milk.
A Note on Ingredient Proportions
Using one can of condensed milk to one cup of sugar gives a caramel with just the right balance of chewiness and sweetness, and it’s worth understanding why that balance matters before adjusting it. Enough sugar needs to be present to caramelize properly and give the candy its classic deep color and flavor, while the condensed milk needs to be plentiful enough to keep the finished caramel chewy rather than brittle. This particular ratio is what gives the finished batch its classic soft-but-sliceable texture, so it’s worth treating the stated amounts as a tested baseline.
A Quick Note on Serving Temperature
These caramels taste wonderful at room temperature, where they’re at their chewiest, but they hold their shape best for cutting and wrapping when served slightly chilled. If serving at a warm-weather gathering, keeping them in a cool spot until just before serving helps them stay neat rather than becoming too soft and sticky.
Why This Recipe Is Naturally a Good Project for Patient Beginners
Because this recipe involves cooking on the stovetop and requires real attention during the cooking step, it’s best made by an adult or with close supervision rather than being a fully hands-off kids’ project. That said, measuring the two ingredients, lining the pan, and later cutting and wrapping the cooled caramels are all tasks a child can help with happily. The stovetop stirring itself is a good opportunity to show a older child or teenager how candy-making actually works, with a result that feels genuinely impressive once it’s finished.
A Quick Note on Portion Control
Because these caramels are rich and dense, one or two goes a long way here compared to a lighter candy. Cutting the pan into smaller squares is an easy way to stretch the batch further and keep portions naturally smaller for a gift tin or party platter.
A Note on Presentation
How you serve these caramels changes the impression they make almost as much as the flavor itself. Cut into plain squares on a plate, they read as a simple, homemade candy. Individually wrapped in small parchment twists and sprinkled with flaky salt, the same caramels suddenly look like something from a specialty confectionery shop, which makes this a surprisingly versatile recipe to keep in rotation for both casual snacking and gift-giving.
Why This Recipe Is So Rewarding
Part of what makes these caramels such a satisfying recipe to make is watching the transformation happen right in front of you, from a pale, simple mixture into a deep amber candy over the course of about twenty minutes at the stove. There’s no candy thermometer to second-guess and no complicated sugar-stage vocabulary to worry about, just color, thickness, and a steady hand with the spatula. As long as the heat stays gentle and the stirring stays constant, the result is consistent nearly every time, which makes this a genuinely rewarding project for anyone curious about making real caramel at home.
A Final Thought on This Recipe
Recipes built around just two pantry staples tend to earn their place in a regular rotation not because they’re flashy, but because they solve a real problem: a gift tin needs filling, or a craving for something rich and chewy hits, and a full candy-making session with a thermometer and multiple sugar stages isn’t always realistic. 2-Ingredient Condensed Milk Caramels answers that need reliably, using ingredients most kitchens already have on hand, and turning them into something that tastes like it came from a specialty confectionery counter. That combination of simplicity and payoff is exactly why this recipe is worth keeping close at hand.
A Word on Texture
The texture of these caramels sits right in the classic chewy-caramel range, neither too soft to hold its shape nor too hard to bite through easily, and getting there depends entirely on how long the mixture cooks on the stove. Because the structure comes from sugar and milk proteins cooked together rather than a quick melt-and-chill method, these caramels have a genuine, old-fashioned pull to them. A batch that’s cooked to the right color and chilled the full amount of time holds its shape cleanly when cut, while still giving that satisfying chew with every bite.
A Note on Cutting Clean Squares
Using a lightly greased, sharp knife wiped clean between cuts gives the neatest, most even squares once the caramel is fully set. Letting the caramel sit at room temperature for a few minutes before cutting also helps, since caramel straight from the refrigerator can be a bit too firm to slice smoothly at first.

A Final Note on Batch Size
This recipe is sized for a single 8-inch pan, which keeps the whole process manageable in about an hour and a half including cooling and chilling time. For a bigger batch to fill a larger gift tin or holiday platter, cook the mixture in two separate batches rather than doubling everything in one pot at once, since a larger volume takes considerably longer to reduce and is much easier to scorch along the way. Working through it in smaller batches keeps the color and texture consistent across every square, and it’s a small extra step that makes a real difference once the caramel is chilled and ready to cut.
Common Questions
Do I need a candy thermometer for this recipe?
No, this recipe relies on color and texture as its guide rather than a specific temperature.
Why does my caramel have scorched bits?
The heat was likely too high or the stirring wasn’t constant enough; use medium-low heat and stir the whole time.
Can I add vanilla or salt to this recipe?
Yes, a splash of vanilla once it’s off the heat or a sprinkle of flaky salt on top both work well.
How do I know when the caramel has cooked long enough?
It should look thick, glossy, and deep golden-amber, and coat the spatula rather than dripping off quickly.
Can I double this recipe?
Yes, but cook it in two separate batches rather than doubling everything in one pot, since a larger volume is harder to manage.
How should I store leftovers?
Store in an airtight container at room temperature for up to a week, or refrigerate for longer storage.
Can I freeze these caramels?
Yes, wrap them individually and freeze in an airtight container for up to 3 months; thaw at room temperature before serving.
2-Ingredient Condensed Milk Caramels turn a can of condensed milk and a cup of sugar into a rich, chewy candy with nothing more than a saucepan and a little patience. Cook, pour, chill, and cut, that’s the entire process, and the result tastes like something from a specialty confectionery shop.