
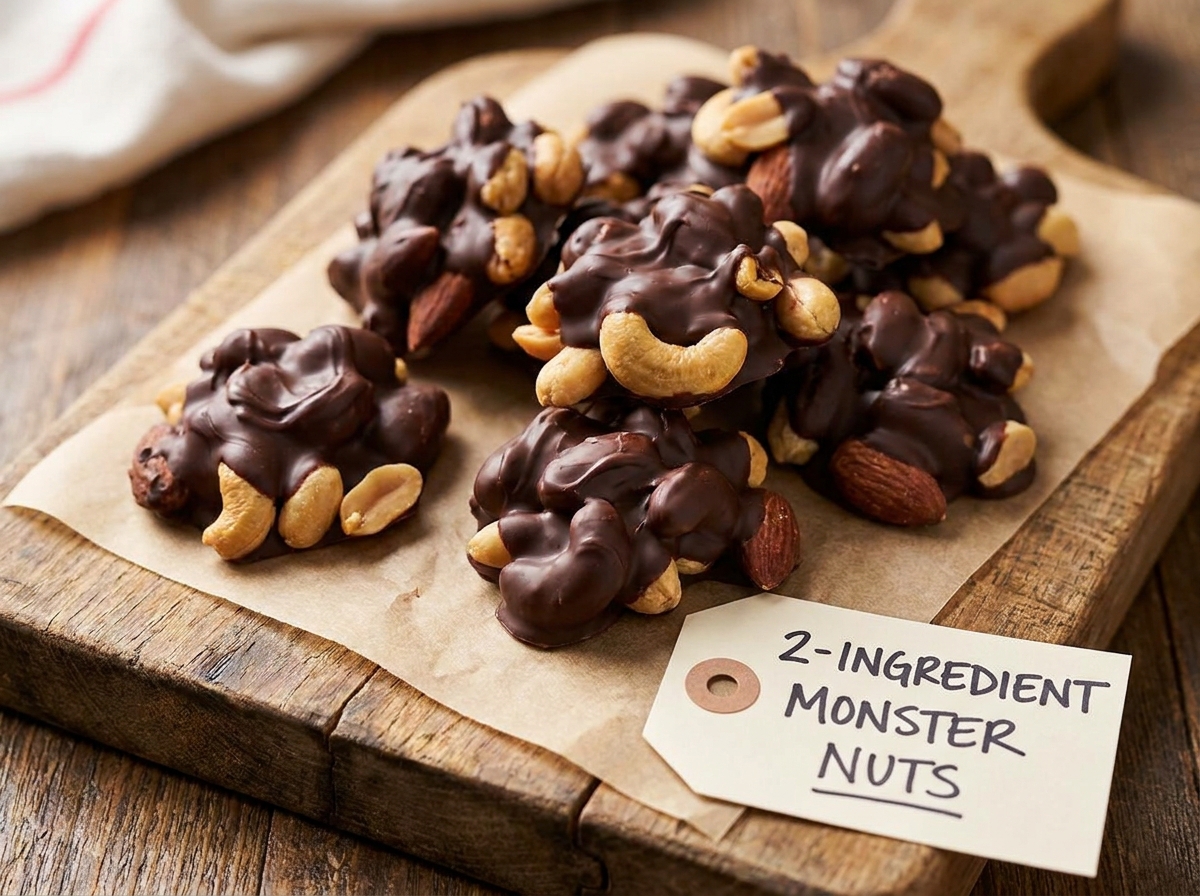
Monster Nuts Chocolate Clusters
Roasted mixed nuts folded into melted chocolate and chilled into craggy, bite-sized clusters, easy to dress up into little monsters.
Thank you for reading this post, don't forget to subscribe!
Two pantry staples turn into a rich, craggy chocolate cluster studded with roasted mixed nuts, no oven and no candy thermometer required. There’s a smooth, melted chocolate base folded with a generous amount of nuts, and the whole thing comes together on a baking sheet with nothing more than a microwave and a spoon.
Melting chocolate chips and folding in roasted mixed nuts until every piece is coated is most of the process here. Dropping spoonfuls onto a tray and chilling until set is all that’s left before these clusters are ready to eat.
With their irregular, bumpy shape, these clusters are naturally suited to a playful Halloween finish, whether that means a few candy eyes pressed on top or a scatter of colorful sprinkles to turn each one into its own little monster.
Why This Recipe Works
Melting semi-sweet chocolate chips and folding in roasted mixed nuts creates a rich, cohesive base without any cooked sugar syrup or candy thermometer involved, since the melted chocolate acts as both the binder and the flavor base holding the nuts together. Because the nuts are left mostly whole rather than chopped fine, these clusters end up with a naturally bumpy, craggy shape once dropped onto the tray.
That irregular shape is actually part of what makes these clusters so easy to dress up for Halloween, since a few candy eyes and some sprinkles tucked into the nooks and crannies instantly give each cluster its own little monster personality.
Why Using Mixed Nuts Matters
Using a mix of roasted nuts, rather than just one variety, gives these clusters a more interesting texture and flavor in every bite, since each nut brings its own size, shape, and crunch to the mixture. A bag of roasted mixed nuts from the baking aisle is the simplest way to get that variety without buying several separate bags.
What You’ll Need
- 2 cups (340g) semi-sweet chocolate chips
- 1½ cups (210g) roasted mixed nuts
You’ll also need a parchment-lined baking sheet. This recipe makes about 12 clusters.
A Note on Ingredient Choices
Semi-sweet chocolate chips give these clusters a balanced sweetness that lets the roasted nuts come through clearly, though dark or milk chocolate chips both work well depending on your preference. A roasted, lightly salted mixed nut blend, often including almonds, cashews, pecans, walnuts, and macadamias, gives the best variety of texture and flavor.
Equipment You’ll Need
A microwave, a microwave-safe bowl, and a parchment-lined baking sheet are all you need; no oven required.
How to Make It
- Melt. Melt the chocolate chips in the microwave in 20–30-second intervals, stirring until smooth.
- Fold. Fold the roasted mixed nuts into the melted chocolate until evenly coated.
- Portion. Drop spoonfuls of the mixture onto a parchment-lined baking sheet.
- Chill. Refrigerate for 30–45 minutes, or until the chocolate is completely set.
- Serve. Serve chilled or store in an airtight container.
Getting an Even Fold
Folding the nuts into the melted chocolate gently but thoroughly, making sure every nut is coated before portioning the mixture onto the tray, is what keeps these clusters from having dry, uncoated spots. Working while the chocolate is still warm and fluid makes this step much easier than waiting until it starts to firm up.

Getting Even Clusters Across the Batch
Using a consistent spoonful size for every portion helps the whole batch chill and set at roughly the same rate. Spacing the clusters a little apart on the tray, rather than letting them touch, keeps each one distinct and easier to lift off once set.
Knowing When It’s Done
These clusters are ready once the chocolate feels completely firm to the touch and no longer looks wet or glossy, usually somewhere in the 30 to 45 minute range in the refrigerator. If a cluster still feels soft in the center when pressed, give the tray another 10 minutes before checking again.
Tips for Perfect Monster Nut Clusters
Working quickly once the chocolate is melted helps the mixture stay warm and pliable enough to fold in the nuts evenly before it starts to firm up. Using a cookie scoop for portioning helps every cluster come out close to the same size, even with large, irregular nuts mixed throughout.
Troubleshooting Common Issues
My chocolate is seizing up instead of melting smoothly. It was likely overheated; melt in shorter 10-second bursts and stir more frequently. My clusters are falling apart. The mixture may not have been chilled long enough, or there wasn’t quite enough chocolate to bind all the nuts; give it another 10 minutes in the refrigerator before handling. My clusters are too big and awkward to eat in one bite. Use a smaller spoonful for each portion; these clusters are meant to be a little craggy, but a smaller size is easier to handle. My decorations aren’t sticking. Press candy eyes and sprinkles onto the chocolate while it’s still wet, right after portioning, for the best hold.
A Few Ways to Make It Yours
Dark Chocolate Version
Swap the semi-sweet chips for dark chocolate for a richer, less sweet cluster.
Single-Nut Version
Use just one type of nut, like pecans or almonds, for a simpler, more classic cluster.
Salted Finish
Sprinkle a little flaky sea salt over the clusters right after portioning for a sweet-salty contrast.
Monster Decoration
Press on candy eyes and colorful sprinkles while the chocolate is still wet for a playful Halloween look.
The classic version is worth trying first so you know the baseline flavor before adding any extras.
How to Store Monster Nut Clusters
Keep the clusters in an airtight container at room temperature for up to two weeks, or in the refrigerator for a firmer bite. Storing them in a single layer, or with parchment between layers, keeps any decorations from smudging against each other.
When to Serve These Clusters
These clusters work well for a Halloween party dessert table, a classroom treat exchange, or any time a simple, nutty chocolate candy sounds appealing. They also make a great grab-and-go snack any time of year, since the flavor isn’t tied to any particular season once the decorations are left off.
Nutrition and Serving Information
This recipe makes about 12 clusters at roughly 180 calories per cluster, though exact calorie content will vary depending on the specific brands of chocolate and nuts used. Because this recipe contains tree nuts and dairy, it isn’t appropriate for anyone avoiding those ingredients.
Make-Ahead Tips
These clusters are a genuinely good make-ahead treat, since they hold their texture well at room temperature or in the refrigerator for up to two weeks after chilling. Making a batch several days before a Halloween party removes any last-minute pressure entirely.
The Science Behind This Cluster
Melted chocolate firms up as it cools because the cocoa butter it contains re-solidifies at cooler temperatures, which is what binds the roasted nuts into a cohesive cluster without any additional binder needed. Because nuts are naturally irregular in size and shape, the finished clusters take on a craggy, uneven silhouette that’s quite different from a smooth, molded candy, which is part of their charm.
Portioning and Yield
This recipe makes about 12 clusters from a single batch, a good amount for a Halloween party or a small gift bag. Doubling the ingredients works well for a larger batch, though it’s easiest to melt the chocolate in two separate rounds so the folding step stays manageable.
A Little Bit of History
Chocolate-covered nut clusters have been a popular candy counter treat for generations, prized for how simply a bag of roasted nuts and a bar of chocolate can turn into something that feels special. This version keeps that same straightforward approach while leaning into a Halloween theme through its naturally bumpy, easy-to-decorate shape.
Serving Suggestions
Serve these clusters piled in a bowl or jar labeled with a playful name, with a few extra nuts scattered around for a rustic, candy-shop look. A handful of candy eyes and sprinkles set out alongside the clusters lets guests decorate their own monster cluster right at the table.
Choosing the Right Nuts
A roasted, salted mixed nut blend gives the best variety of texture and flavor, though you can easily swap in whatever nuts you have on hand or prefer. Larger nuts like pecan halves and whole almonds give these clusters their signature craggy look, while smaller nuts like peanuts fill in the gaps nicely.
Why This Recipe Is So Beginner-Friendly
If you’ve never made no-bake candy before, this is about as forgiving a place to start as you’ll find. There’s no cooked sugar stage and no candy thermometer, just melting, folding, and chilling in a few simple steps. With only two ingredients, there’s very little room for the kind of mistakes that can derail a more involved recipe, which makes this a great project for a first-time cook or a kid who wants to help fold in the nuts and decorate the finished clusters.
Adjusting the Flavor to Your Taste
As written, these clusters get their flavor almost entirely from the chocolate and the roasted mixed nuts, giving a rich, nutty taste. If you’d like a different flavor profile, swapping in a different chocolate or a single type of nut leans the whole cluster in a new direction. Because this recipe has so few ingredients to begin with, small changes tend to have a noticeable effect on the final flavor, so it’s worth trying the classic version first before deciding what, if anything, you’d like to change.
Pairing These Clusters With Other Treats and Drinks
Because the flavor here is rich and nutty rather than overly sweet, these clusters pair naturally with sweeter, more sugar-forward treats if you’re serving more than one dessert, since the contrast keeps a spread feeling balanced. A sweet coconut or fruit-based candy rounds out a dessert table nicely alongside these, while another nut-based treat leans further into the same direction. On the drink side, these clusters pair well with coffee, red wine, or hot cider.
A Note on Ingredient Proportions
Using 2 cups of chocolate against 1½ cups of nuts gives a cluster that’s generously studded with nuts without becoming so nut-heavy that it falls apart, and it’s worth understanding why that balance matters before adjusting it. Too many nuts relative to the chocolate leaves the mixture too dry to hold together, while too few leaves the clusters tasting mostly like plain chocolate. This particular ratio is what gives the finished clusters their classic craggy, nut-forward bite, so it’s worth treating the stated amounts as a tested baseline.
A Quick Note on Serving Temperature
These clusters taste good at any temperature, but they hold their shape best served at cool room temperature or chilled, since a warm cluster can soften enough for the chocolate base to lose its structure. If serving at a warm gathering, keeping the platter in a cooler or shaded spot helps the clusters hold.
Why This Recipe Is Naturally Kid-Friendly to Make
Because this recipe involves folding nuts into melted chocolate and dropping spoonfuls onto a tray, it’s a genuinely fun treat to make with kids, with the microwave melting step handled by an adult. Pressing on candy eyes and sprinkles to turn each cluster into its own little monster is an especially fun, hands-on finishing task that makes this a natural choice for a Halloween baking afternoon.
A Quick Note on Portion Control
Because these clusters are rich with chocolate and nuts, one or two go a long way here compared to a lighter snack. Making slightly smaller clusters is an easy way to stretch the batch further and keep portions naturally smaller for a classroom treat bag or a larger party.

A Note on Halloween Presentation Ideas
How you finish these clusters changes the impression they make almost as much as the flavor itself. Left plain, they read as a simple nut cluster. Decorated with candy eyes tucked between the nuts and a scatter of colorful sprinkles, the same clusters suddenly look like a whole family of little monsters, which makes this a recipe worth dressing up differently depending on the occasion.
A Final Note on Batch Size
This recipe is sized to make about 12 clusters, which keeps the whole process manageable within about an hour including the chilling step. For a bigger batch to fill out a longer Halloween dessert table, melt the chocolate in separate rounds rather than trying to scale everything up at once, since too large a volume of warm chocolate becomes harder to fold evenly with the nuts.
A Word on Texture
The texture of these clusters comes from the contrast between the smooth, firm chocolate base and the varied crunch of whatever nuts happen to land in each spoonful. That variety is part of what makes these clusters interesting to eat, since no two bites are ever quite the same depending on which nuts ended up where. It’s also why using a true mixed nut blend, rather than a single variety, makes such a noticeable difference in the finished texture.
A Note on Working With Melted Chocolate
Chocolate can scorch or seize if melted too quickly or at too high a power level, which is why short intervals with thorough stirring between each matter so much here. Using a completely dry bowl and dry utensils also helps, since even a small amount of water can cause melted chocolate to seize into a thick, unworkable mass that won’t coat the nuts smoothly.
A Note on Gifting This Batch
Because they hold their shape well once set, these clusters travel nicely as a homemade gift, provided they’re kept reasonably cool along the way in warmer weather. Layered into a small tin or jar with parchment between layers, a dozen clusters makes a simple, crowd-pleasing gift for a nut-loving friend or a classroom treat exchange. A playful, hand-labeled jar is an easy way to tie the gift into a Halloween theme.
A Note on Scaling Down the Batch
If a full batch of 12 clusters is more than you need, this recipe halves easily, since the ratio between chocolate and nuts stays simple to work out either way. A smaller batch is a good option for a quick craving or a single gift jar without committing to a full tray, and it still only takes the same handful of minutes to melt, fold, and chill before the clusters are ready.
A Note on Turning These Into Monsters
Part of what makes this recipe so well suited to Halloween is how little extra work it takes to turn a plain nut cluster into something playful. Because the nuts poke out at odd angles once the chocolate sets, there are natural little gaps and bumps to tuck a candy eye or two into, and a scatter of colorful nonpareil sprinkles pressed on while the chocolate is still wet reads almost like fur or scales once it hardens. No two decorated clusters ever end up looking quite the same, which is part of the fun when making a batch with kids.
A Note on Nut Allergies and Substitutions
Because the entire texture and flavor of this recipe comes from the mixed nuts, there isn’t a simple one-to-one substitute for someone avoiding tree nuts or peanuts. A seed-based mix, such as roasted pumpkin seeds and sunflower seeds, can stand in for the nuts in roughly the same proportion and still gives a satisfying crunch, though the flavor will be noticeably different from the original. Always double check that any substitute ingredient, and the chocolate itself, is processed in a facility that matches whatever allergy concerns are relevant for your guests.
Common Questions
Can I use a single type of nut instead of a mixed blend?
Yes, any roasted nut works well on its own, though a mix gives more variety in texture.
Why is my chocolate seizing up instead of melting smoothly?
It was likely overheated; melt in shorter bursts and stir more frequently between each.
Can I use unsalted nuts instead of salted?
Yes, though a lightly salted nut adds a nice contrast to the sweet chocolate.
How do I know when the clusters are fully set?
They should feel completely firm to the touch and no longer look wet or glossy.
Can I double this recipe?
Yes, simply double both ingredients and melt the chocolate in multiple rounds so the folding step stays manageable.
How should I store leftovers?
Keep the clusters in an airtight container at room temperature for up to two weeks.
Can I freeze these clusters?
Yes, they freeze well in an airtight container for up to 2 months; thaw at room temperature before serving.
However you decorate them and whoever you share them with, these monster nut chocolate clusters deliver rich, craggy, nutty flavor with nothing more than two simple ingredients and a microwave. It’s proof that a quick no-bake treat can still be the most playful thing on the Halloween table.