
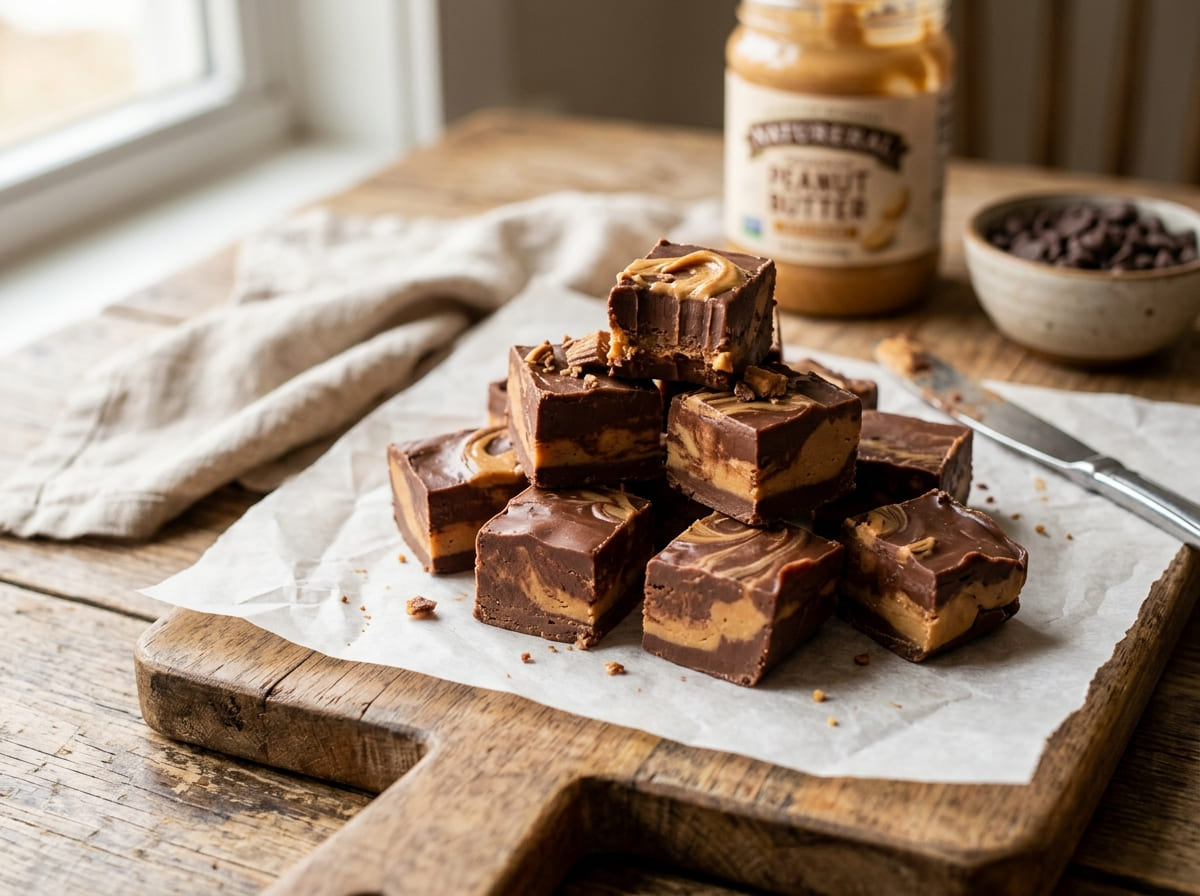
2-Ingredient Creamy Reese’s Fudge Bites
Melted milk chocolate stirred with creamy peanut butter until silky, then chilled into rich, peanut butter cup-inspired fudge bites.
Thank you for reading this post, don't forget to subscribe!
Just two ingredients turn into rich, creamy, peanut butter cup-inspired fudge bites, with no oven and no candy thermometer required. There’s milk chocolate melted until smooth, stirred together with creamy peanut butter, and spooned into little candy liners to chill.
Melting the milk chocolate chips in short bursts, stirring in the peanut butter until the mixture turns silky and evenly combined, and spooning it into a lined mini muffin pan is most of the process here. An hour or two in the refrigerator is all that’s left before these bites are ready to enjoy.
Creamy, sweet, and full of chocolate and peanut butter flavor, these fudge bites are an easy homemade candy for peanut butter lovers, a holiday dessert tray, or any time a quick little sweet treat sounds just right.
Why This Recipe Works
Stirring creamy peanut butter into melted milk chocolate creates a smooth, rich mixture that sets firm in the refrigerator without any sugar syrup, condensed milk, or candy thermometer. The cocoa butter in the chocolate firms up as it chills, while the natural oils in the peanut butter keep the texture soft and creamy, which is what gives these bites their melt-in-your-mouth fudge texture rather than the hard snap of a chocolate bar.
Because milk chocolate and peanut butter are already sweet and full of flavor on their own, there’s no extra sugar to add, and the pairing tastes remarkably like the inside and outside of a peanut butter cup blended into one.
Why Melting the Chocolate First Matters
Melting the milk chocolate chips completely before adding the peanut butter, rather than heating both together from the start, gives you better control over how smooth the chocolate gets. Once the chocolate is fully melted and glossy, the peanut butter stirs in easily and blends into a silky, even mixture without any grainy streaks.
What You’ll Need
- 2 cups (340g) milk chocolate chips
- 1 cup (250g) creamy peanut butter
You’ll also need a mini muffin pan lined with 12 paper candy liners, or a silicone mini muffin mold. This recipe makes 12 bites.
A Note on Ingredient Choices
Regular shelf-stable creamy peanut butter, rather than a natural peanut butter that separates, gives these bites the smoothest, most consistent texture and helps them set reliably. Milk chocolate chips are what give the bites their classic peanut butter cup flavor, while semi-sweet chips make a slightly darker, less sweet version if you prefer.
Equipment You’ll Need
A microwave-safe bowl, a rubber spatula, a spoon, and a mini muffin pan lined with paper candy liners or a silicone mini muffin mold are all you need; no oven or candy thermometer required.
How to Make It
- Prepare the pan. Line a mini muffin pan with 12 paper candy liners or use a silicone mini muffin mold.
- Melt the chocolate. Place the milk chocolate chips in a microwave-safe bowl. Microwave in 20–30 second intervals, stirring between each interval, until smooth and fully melted.
- Add the peanut butter. Stir the creamy peanut butter into the melted chocolate until the mixture is silky, smooth, and evenly combined.
- Fill the molds. Spoon the chocolate peanut butter mixture into the prepared liners, filling each about three-quarters full. Gently tap the pan on the counter to smooth the tops.
- Chill. Refrigerate for 1–2 hours, or until the fudge bites are firm enough to remove from the liners.
- Serve. Let the bites sit at room temperature for about 5 minutes before serving for a softer, creamier texture.
Getting a Silky, Smooth Mixture
Stirring the peanut butter into the warm chocolate with steady, gentle strokes until no streaks remain, rather than stopping as soon as it looks mostly combined, is what gives these bites their signature silky texture. The mixture should look glossy and uniform in color, and it should fall from the spatula in a thick, smooth ribbon.

Getting Even, Smooth Tops
Spooning the mixture into each liner to about three-quarters full and giving the pan a few gentle taps on the counter helps every bite settle into a smooth, level top before chilling. Filling the liners evenly also means all 12 bites set at the same time, so none are left soft while the others are ready.
Knowing When It’s Done
These fudge bites are ready once they feel completely firm to a light touch and pull away cleanly from their liners or silicone molds. If the centers still feel soft after an hour, give them the full 2 hours in the refrigerator, checking every 20 to 30 minutes until they’re set.
Tips for Perfect Reese’s Fudge Bites
Melting the chocolate slowly in short bursts and stirring often, rather than heating it for one long stretch, keeps it from turning thick, grainy, or scorched. Letting the chilled bites rest at room temperature for about 5 minutes before serving gives them their softest, creamiest texture.
Troubleshooting Common Issues
My chocolate turned thick and grainy. It was likely overheated; melt in shorter intervals and stir more often next time. My fudge bites won’t set. They may need more time in the refrigerator, or a natural peanut butter was used; chill them longer and use a regular creamy peanut butter. My mixture looks oily or separated. The chocolate may have been too hot when the peanut butter went in; let it cool for a minute and stir vigorously to bring it back together. My bites are sticking to the liners. They’re probably not fully set yet; chill them a little longer before peeling.
A Few Ways to Make It Yours
Peanut Butter Cup Topping
Press chopped Reese’s peanut butter cups onto each bite right after filling the liners.
Swirled Fudge Squares
Spread the mixture in a parchment-lined 8-inch pan, swirl in extra peanut butter, chill, and cut into squares.
Chip Sprinkle
Scatter a few chocolate chips and peanut butter chips over the tops before chilling.
Salted Finish
Sprinkle a tiny pinch of flaky sea salt on each bite to balance the sweetness.
The classic version is worth trying first so you know the baseline flavor before adding any extras.
How to Store These Fudge Bites
Keep the fudge bites in an airtight container in the refrigerator for up to one week, since they soften quickly when left warm. For longer storage, freeze them in a sealed container for up to two months and thaw them in the refrigerator before serving.
When to Serve These Fudge Bites
These bites work beautifully for a holiday dessert tray, a Halloween party, a cookie exchange, or a simple after-dinner treat. They’re also a fun addition to a candy table, where their bite-sized shape makes them easy to grab.
Nutrition and Serving Information
This recipe makes 12 bites at roughly 150 calories per bite, with about 11 grams of fat, 13 grams of carbohydrates, and 3 grams of protein, though exact nutrition will vary depending on the brands of chocolate and peanut butter used. Because this recipe contains peanuts and dairy from the milk chocolate, it isn’t appropriate for anyone with a peanut allergy or avoiding dairy products.
Make-Ahead Tips
These fudge bites are a genuinely good make-ahead treat, since they need a chill anyway and keep well for a full week in the refrigerator. Making them a day or two before a gathering removes any last-minute pressure entirely.
The Science Behind This Fudge
Chocolate firms up as it cools because the cocoa butter inside it crystallizes and solidifies, locking the mixture into shape. Peanut butter brings its own natural oils, which stay softer than cocoa butter at refrigerator temperature, and blending the two fats together is what turns firm, snappy chocolate into a soft, creamy, sliceable fudge. The peanut solids in the peanut butter also thicken the mixture, which helps the bites hold their shape without any added sugar or condensed milk.
Portioning and Yield
This recipe makes 12 bites from a standard mini muffin pan, a good amount for a small gathering or a week of after-dinner treats. Using smaller candy liners gives about 20 to 24 tiny bites, which is a nice option for a crowded dessert table or a gift box.
A Little Bit of History
The peanut butter cup was created in the late 1920s by H.B. Reese, a former dairy farmer and candy maker in Hershey, Pennsylvania, and it quickly became one of America’s best-loved candies. Easy two-ingredient fudge made with melted chocolate became a home kitchen favorite much later, and these bites bring both ideas together into one simple, creamy treat.
Serving Suggestions
Serve these fudge bites slightly cool, in their paper liners or peeled and arranged on a board lined with parchment. A few chopped peanut butter cups and a scattering of peanut butter chips around them make a simple, inviting presentation.
Choosing the Right Peanut Butter
A regular, no-stir creamy peanut butter is the best choice here, offering a smooth texture and consistent oil content that help these bites set reliably. Natural peanut butter that separates can work in a pinch, but stir it thoroughly first and expect the bites to be a little softer.
Why This Recipe Is So Beginner-Friendly
If you’ve never made fudge or candy before, this is a genuinely forgiving place to start, since there’s no boiling sugar, no candy thermometer, and no precise temperature to hit. With just two ingredients, a bowl, and a spoon, there’s very little room for the kind of mistakes that can derail a traditional stovetop fudge, which makes this a great first project.
Adjusting the Flavor to Your Taste
As written, these bites get their flavor entirely from the milk chocolate and creamy peanut butter, giving a sweet, classic peanut butter cup taste. If you’d like a different flavor profile, swapping in semi-sweet or dark chocolate or adding a pinch of flaky salt shifts the whole bite in a new direction while keeping the same simple method. Because this recipe has so few ingredients to begin with, small changes tend to have a noticeable effect on the final flavor, so it’s worth trying the classic version first before deciding what, if anything, you’d like to change.
Pairing These Fudge Bites With Other Treats and Drinks
Because the flavor here is rich and chocolatey, these bites pair naturally with lighter, brighter desserts if you’re serving more than one, since the contrast keeps a spread feeling balanced. A lemon bar or a fruit-based treat rounds out a dessert table nicely alongside these, while another peanut butter or caramel treat leans further into the same indulgent direction. On the drink side, these bites pair well with a cold glass of milk, a hot coffee, or a mug of hot cocoa.
A Note on Ingredient Proportions
Using two cups of milk chocolate chips against one cup of peanut butter keeps the bites firm enough to hold their shape, with the peanut butter adding creaminess rather than softening them too much, and it’s worth understanding why that balance matters before adjusting it. Adding more peanut butter relative to the chocolate can leave the bites too soft to peel from their liners, while using less makes them firmer and more like a plain chocolate candy. This particular ratio is what gives the finished bites their creamy texture, so it’s worth treating the stated amounts as a tested baseline.
A Quick Note on Serving Temperature
These bites taste best slightly cool, about 5 minutes out of the refrigerator, which is when they’re soft and creamy but still hold their shape. If serving at a warm gathering, keeping them on a chilled plate or in a shaded spot helps them hold.
Why This Recipe Is Naturally Kid-Friendly to Make
Because this recipe involves melting, stirring, and spooning, with no oven or hot stovetop involved at any point, it’s a genuinely fun treat to make with kids. With an adult handling the warm bowl, little helpers can line the pan, fill the liners, and add their own toppings, which makes this an easy, rewarding weekend project.
A Quick Note on Portion Control
Because these bites are rich with chocolate and peanut butter, one or two go a long way compared to a lighter dessert. Their small, pre-portioned size already makes it easy to enjoy just a little at a time.

A Note on Presentation
How you finish these fudge bites changes the impression they make almost as much as the flavor itself. Served plainly in their liners, they read as a simple homemade candy. Topped with chopped peanut butter cups, a few chocolate and peanut butter chips, and a swirl of extra peanut butter, the same fudge suddenly looks like something from a candy shop window, which makes this a recipe worth dressing up for a party or keeping simple for an everyday treat.
A Final Note on Batch Size
This recipe is sized to make 12 bites, which keeps the whole process manageable within about an hour or two including the chilling step. For a bigger batch, double both ingredients and use two mini muffin pans, or set the mixture in an 8-inch square pan and cut it into squares.
A Word on Texture
The texture of these bites comes from the way peanut butter softens the chocolate as it sets, creating a dense, creamy fudge rather than a crisp candy shell. That soft, smooth texture is part of what makes each bite feel so indulgent, and it’s why a short rest at room temperature before serving matters so much, since it brings the creaminess back after chilling.
A Note on Working With Melted Chocolate
Milk chocolate is more delicate than dark chocolate because of its milk solids, and it can scorch or turn grainy if heated too long or too quickly. Stirring between every short microwave burst is the best way to judge how melted it really is, and finishing the last few lumps with residual heat and stirring, rather than another round in the microwave, keeps the chocolate silky and smooth.
A Note on Gifting This Batch
Because they come pre-portioned in their own liners, these fudge bites make a lovely homemade gift for neighbors, teachers, or friends during the holidays. Packed in a small box or tin and kept cold until delivery, they make a thoughtful, festive treat.
A Note on Scaling Down the Batch
If 12 bites is more than you need, this recipe halves easily, since the ratio between chocolate and peanut butter stays simple to work out. A smaller batch is a good option for a quick craving without committing to a full pan, and it still only takes a few minutes to stir together before chilling.
A Note on Choosing Your Mold
A standard mini muffin pan lined with paper candy liners is what this recipe is written for, giving neat, bite-sized portions that are easy to serve. A silicone mini muffin mold works just as well and lets the bites pop out cleanly without liners. For fudge squares instead, an 8-inch square pan lined with parchment is the best choice. Whatever mold is used, filling each cup evenly gives the most consistent bites once set.
Why Candy Liners Make a Difference
Lining the mini muffin pan with paper candy liners keeps every bite neatly portioned and easy to lift out, rather than prying soft fudge from the pan one piece at a time. The liners also keep fingers clean when serving and make the bites ready to pack for gifting without any extra wrapping.
Common Questions
Can I use semi-sweet chocolate chips instead of milk chocolate?
Yes, semi-sweet chips work well and make a slightly darker, less sweet fudge bite.
Why did my chocolate turn grainy?
It was likely overheated; melt it in short 20 to 30 second intervals and stir well between each one.
Can I use natural peanut butter?
You can, but natural peanut butter that separates may make the bites softer; regular creamy peanut butter gives the most reliable texture.
Can I make this in a pan instead of liners?
Yes, spread the mixture in an 8-inch square pan lined with parchment, chill until firm, and cut into squares.
How do I know when they’re set?
They should feel firm to a light touch and pull cleanly away from their liners or molds.
How should I store leftovers?
Keep the fudge bites in an airtight container in the refrigerator for up to one week.
Can I freeze these fudge bites?
Yes, freeze them in a sealed container for up to two months and thaw them in the refrigerator before serving.
However you top them and whoever you share them with, these creamy Reese’s fudge bites deliver rich chocolate and peanut butter sweetness from nothing more than two simple ingredients and a bowl. They’re proof that a homemade candy doesn’t need a candy thermometer to come together beautifully.