
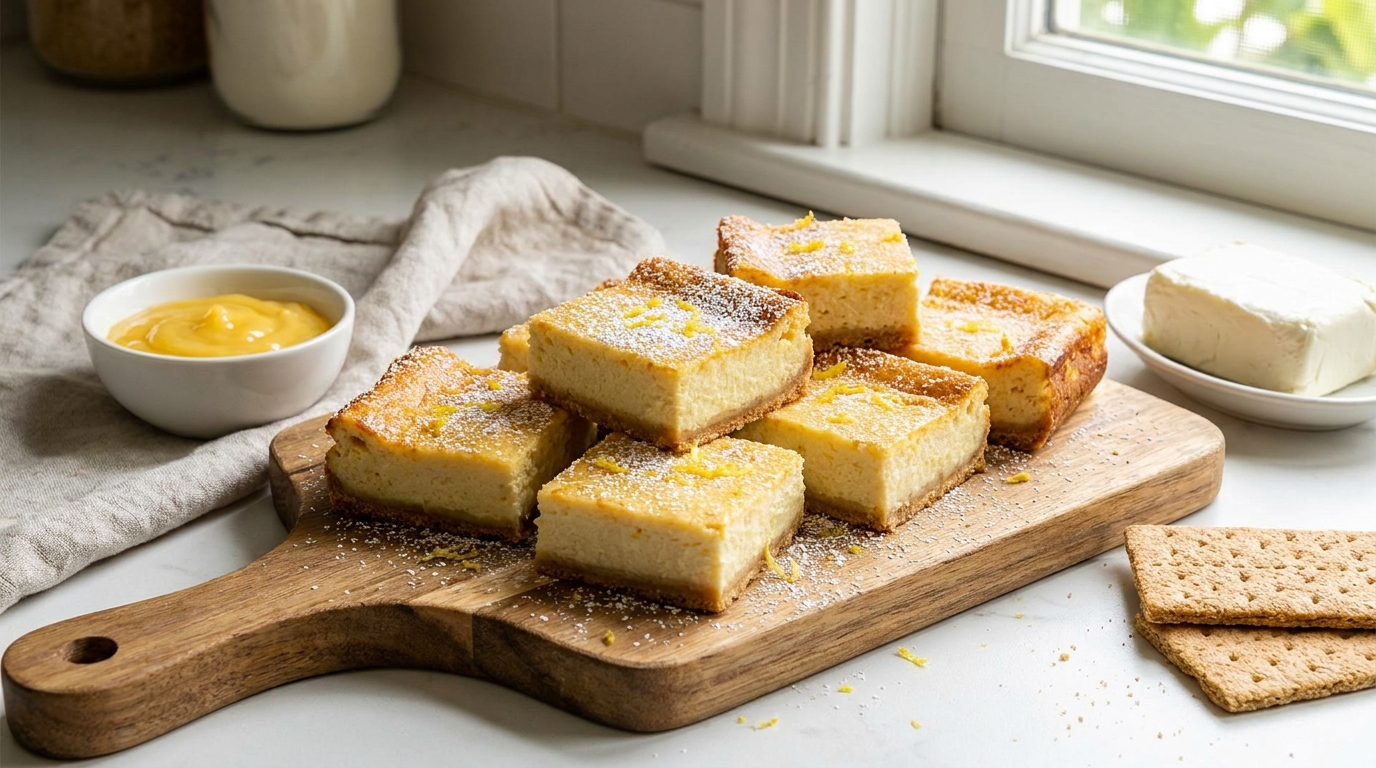
3-Ingredient Lemon Cheesecake Bars
A graham cracker base under a bright, tangy cheesecake filling — no water bath, no cracking, just slice and serve.

Cheesecake has a reputation for being fussy — water baths, cracked tops, springform pans that leak batter onto the oven floor. These bars sidestep almost all of that, trading a whole cheesecake for a simple pan of bars built from just three ingredients.
Cream cheese, sweetened condensed milk, and fresh lemon juice, whisked together and poured over a graham cracker crust, bake into a dense, tangy, custard-like filling with none of the usual cheesecake anxiety. No water bath, no worrying about the center jiggling too much or too little, no risk of a deep crack running across the top.
What comes out of the oven looks like a lemon bar and a cheesecake had a very happy collision — bright yellow, dense, and rich, with a graham crust holding everything together underneath.
This is the kind of dessert built for people who love cheesecake’s texture and lemon bars’ bright citrus punch, but don’t necessarily want to commit to either recipe’s full traditional process. It’s genuinely simple enough to make on a weeknight, and impressive enough to serve for a gathering without anyone suspecting how little effort actually went into it.
A Little Bit of History
Lemon bars and cheesecake both have long, well-established places in American home baking, but they’ve traditionally stayed in separate lanes — lemon bars built on a shortbread crust with a tart, cooked lemon curd filling; cheesecake built on a denser cream cheese custard, usually baked slowly and carefully to avoid cracking. Combining the two into a single bar format is a more recent development, driven largely by home bakers looking for the best qualities of both without the more finicky aspects of either.
The three-ingredient method used here — cream cheese, sweetened condensed milk, and lemon juice — draws directly from the tradition of no-fuss, shortcut cheesecake fillings that became popular once sweetened condensed milk offered a stable, pre-sweetened dairy base that could set up reliably with minimal additional ingredients. It’s a close cousin to the no-bake lemon icebox pies that have been popular in home kitchens for decades, adapted here into a baked, sliceable bar format using a graham cracker crust instead of a full pie shell.
Baking this filling, rather than relying purely on the acid-based thickening that a no-bake version would use, gives these bars a denser, more traditional cheesecake texture and allows them to hold a cleaner slice than a purely fridge-set filling typically would — a small but meaningful difference that puts this recipe closer to true cheesecake territory than its no-bake lemon pie cousins.
The broader trend of turning classic pies into bar format — lemon bars from lemon meringue pie, s’mores bars from campfire s’mores, key lime bars from key lime pie — reflects a genuine shift in how home bakers approach favorite flavors. Bars are easier to portion, transport, and serve at a gathering than a sliced pie, which is a large part of why so many pie-inspired bar recipes have become just as popular, if not more so, than their pie counterparts in recent years.
Why This One Works
Sweetened condensed milk is doing much of the heavy lifting in this filling. Already thick, sweet, and rich straight from the can, it needs very little help to become a smooth, pourable cheesecake batter once whisked together with cream cheese and lemon juice. Baking it briefly sets the eggs-free custard into a firm, sliceable texture, without needing the precise low-and-slow baking or water bath that a traditional egg-based cheesecake filling requires to avoid cracking.
The lemon juice serves two purposes at once here. It provides the bright, tart flavor that balances the sweetness of the condensed milk, and its acidity interacts with the dairy proteins to help thicken and stabilize the filling even before it goes into the oven — the same basic chemistry that makes classic key lime pie set up in the fridge without cooking at all. Baking simply finishes and firms that process further, giving these bars their dense, sliceable structure.
Because there’s no egg in this particular filling, there’s also very little risk of the classic cheesecake pitfalls — no curdling from too much heat, no cracking from too rapid a temperature change during cooling. The filling is remarkably forgiving as a result, baking evenly and predictably without the careful monitoring a traditional baked cheesecake demands.
It’s also worth understanding why baking, rather than a purely no-bake approach, gives these bars their particular texture. A baked filling develops a slightly denser, more custard-like structure than a fridge-set filling relying purely on acid to thicken, since heat helps further stabilize the proteins in the cream cheese and condensed milk. That’s part of why these bars slice more like a true cheesecake bar than the softer, spoonable texture of a no-bake lemon pie.
What You’ll Need
- 16 oz cream cheese, softened
- 1 can (14 oz) sweetened condensed milk
- 1/2 cup fresh lemon juiceAbout 3–4 medium lemons, juiced
You’ll also need a graham cracker crust, pressed into an 8-inch square pan, and optional lemon zest and powdered sugar for garnish.
A Closer Look at Each Ingredient
The cream cheese. Full-fat block cream cheese, fully softened, gives this filling its dense, rich texture. Cold cream cheese resists blending smoothly and can leave lumps throughout the finished bars, so don’t skip the softening step — about 30 minutes at room temperature is usually enough.
The sweetened condensed milk. This isn’t the same thing as evaporated milk, despite similar-looking cans — sweetened condensed milk is thick, already sweetened, and central to how this filling sets. Double-check the label before buying, since the two products often sit side by side on grocery shelves.
The lemon juice. Fresh lemon juice makes a real difference here, both in flavor and in how the filling sets. Bottled lemon juice can work in a pinch, but tends to have a duller flavor, and its acidity can vary between brands, sometimes affecting how firmly the filling sets.
The crust. A standard graham cracker crust, whether store-bought or pressed by hand from crumbs, melted butter, and a touch of sugar, gives these bars their sturdy, slightly sweet base. Press it firmly and evenly into the pan for the cleanest slices later.
Equipment You’ll Need
An 8-inch square baking pan lined with parchment paper makes lifting the finished bars out for slicing much easier. A hand mixer or stand mixer helps beat the cream cheese smooth considerably faster than mixing by hand, though a sturdy whisk and some patience will also work. A citrus juicer or reamer speeds up juicing the lemons, and a microplane or fine grater is ideal for zesting if you’re using fresh zest as a garnish.
How to Make Them
- Preheat and prepare. Preheat your oven to 350°F (175°C) and press a graham cracker crust firmly into the bottom of an 8-inch square pan.
- Beat the cream cheese. In a large bowl, beat the softened cream cheese until completely smooth.
- Add the condensed milk. Pour in the sweetened condensed milk and beat until fully combined and glossy.
- Add the lemon juice. Slowly whisk in the fresh lemon juice until the mixture is smooth and slightly thickened.
- Pour over the crust. Pour the filling over the prepared graham cracker crust and smooth the top with a spatula.
- Bake. Bake for 20–25 minutes, until the center is just set and no longer jiggles when gently shaken.
- Cool and chill. Let the bars cool to room temperature, then refrigerate for at least 3 hours, or until fully firm.
- Slice and serve. Dust with powdered sugar and lemon zest, then slice into squares while chilled for the cleanest cuts.


Troubleshooting Common Issues
My filling cracked on top after baking. This is usually a sign of overbaking or too rapid a temperature change during cooling. Pull the bars from the oven as soon as the center is just set, and let them cool gradually at room temperature before refrigerating.
My bars didn’t set firm even after chilling. Give them more time — a full 3 hours in the fridge is the minimum, and an overnight chill often gives the cleanest, firmest slices, especially in a warmer kitchen.
My crust turned soggy underneath the filling. This can happen if the filling was poured in while the crust was still warm from pressing, or if the bars weren’t fully cooled before slicing. Let the crust cool briefly before filling, and always slice while fully chilled.
My filling tastes too tart or not tart enough. This can vary depending on the size and acidity of your lemons. If you prefer a milder flavor, use slightly less lemon juice and a touch more condensed milk to balance it, adjusting to your own taste.
My bars are difficult to slice cleanly. A sharp knife wiped clean and rinsed under hot water between cuts makes a noticeable difference here. Wipe the blade dry each time to prevent the filling from smearing across the top of the bars.
My filling separated or looks curdled after baking. This is uncommon with this method but can happen if the oven ran hotter than expected or the bars baked too long. Check your oven temperature with an oven thermometer if this happens repeatedly, and pull the bars as soon as the center just barely sets.
Serving Suggestions
These bars are bright and rich enough to serve entirely on their own, chilled straight from the fridge, but a few finishing touches take them further. A generous dusting of powdered sugar just before serving gives them a clean, bakery-style finish, while a scatter of fresh lemon zest adds both color and a boost of citrus aroma.
Because they’re baked into a firm, sliceable bar rather than a full pie, these are especially easy to serve at a party or potluck — no plates or forks required for cutting, just a knife to portion them ahead of time. They hold their shape well at room temperature for a couple of hours, making them a reliable choice for spring and summer gatherings, bridal showers, or any occasion where a lighter, citrus-forward dessert fits the mood better than something chocolate-based.
These bars also pair beautifully with a cup of tea, particularly something floral or lightly herbal, since the citrus and dairy richness balance nicely against a lighter beverage. For a more finished presentation, cut the bars into smaller, bite-sized squares rather than large portions, and arrange them on a platter — their bright yellow color makes for an especially appealing display.
These bars also make a lovely contribution to a dessert table specifically because their bright yellow color and light, citrus-forward flavor offer a natural contrast to heavier, chocolate-based desserts that tend to dominate most spreads.
A Few Ways to Make Them Yours
Lime Version
Swap the lemon juice for fresh lime juice for a filling closer to a classic key lime bar, using the exact same method.
Berry Topping
Top with fresh raspberries or blueberries just before serving for a pop of color and a fruitier finish.
Shortbread Crust
Use a shortbread cookie crust instead of graham cracker for a more traditional lemon bar base.
Coconut Addition
Sprinkle shredded coconut over the crust before adding the filling for a subtle tropical undertone.
Make-Ahead Tips
These bars are genuinely well suited to making ahead, since they need a substantial chilling period regardless of when you plan to serve them. They can be baked and chilled up to two days in advance and kept covered in the fridge, which makes them a reliable choice for gatherings where oven time and prep time on the day of serving are already stretched thin.
If you’re adding a powdered sugar or zest garnish, hold off on that until closer to serving time, since powdered sugar can absorb moisture and lose its crisp, white appearance if it sits on the bars for too long before serving.
A Note on Dietary Adjustments
This recipe can be adapted for a few common needs with a little care. For a gluten-free version, use a certified gluten-free graham cracker crust — the filling itself is naturally gluten-free, since there’s no flour involved anywhere in the recipe. For a lower-sugar version, a reduced-sugar sweetened condensed milk can be substituted, though the texture and set may be slightly softer since sugar content affects thickness.
Full dairy-free adaptation is more difficult with this particular recipe, since both cream cheese and sweetened condensed milk are central to how the filling sets and bakes. Dairy-free alternatives to both exist but can behave differently in terms of setting and baking time, so results may vary if you’re substituting for a dairy-free version.
For those managing portion sizes, these bars are rich enough that a smaller square than you might expect is genuinely satisfying — cutting the pan into 20 or 24 pieces instead of the standard 16 works well if you’re serving alongside other desserts at a larger gathering.
Storage
Keep the bars covered in the fridge for up to 5 days — the baked, dense filling holds up well chilled. They also freeze reasonably well for up to a month; wrap tightly and thaw in the fridge overnight before serving.
Common Questions
Can I use bottled lemon juice instead of fresh?
You can, but fresh is strongly recommended here. Bottled lemon juice tends to have a duller flavor and can vary in acidity, which sometimes results in a filling that doesn’t set quite as firmly or taste as bright.
Why does my filling look slightly puffed right out of the oven, then settle as it cools?
This is completely normal — the filling puffs slightly during baking and settles back down as it cools, which is part of why patience during the cooling and chilling process matters for getting clean, level slices.
Can I make these in a 9×13-inch pan for a bigger batch?
Yes — double the ingredients and use a 9×13-inch pan, keeping the crust and filling proportional. Baking time may need a few extra minutes to fully set the larger volume of filling.
How do I know when the bars are done baking?
The edges should look set and the center should have only a slight jiggle, similar to a baked cheesecake. It will continue to firm up significantly as it cools and chills.
Can I freeze these bars?
Yes — wrap them tightly, whether whole or pre-sliced, and freeze for up to a month. Thaw overnight in the fridge before serving for the best texture.
Can I use a homemade graham cracker crust instead of store-bought?
Yes — combine about 1½ cups of graham cracker crumbs with a third cup of melted butter and a couple tablespoons of sugar, press firmly into the pan, and bake for about 8 minutes before adding the filling.
Can I add a meringue topping to these bars?
Yes — spreading a meringue layer over the chilled, set bars and toasting briefly under the broiler gives a lemon meringue-style finish, though this adds an extra step beyond the core three-ingredient method.
Why is my crust crumbly instead of holding together?
This usually means there wasn’t enough melted butter to bind the graham crumbs, or the mixture wasn’t pressed firmly enough into the pan before baking. Press hard and evenly using the flat bottom of a measuring cup for the best results.
One last thing worth mentioning: these bars are a genuinely reliable make-ahead dessert for anyone who loves the bright, tangy flavor of lemon desserts but doesn’t want to deal with the finicky nature of a full baked cheesecake or a cooked lemon curd. Three ingredients, one bowl, and a graham crust are all it takes to get there.