
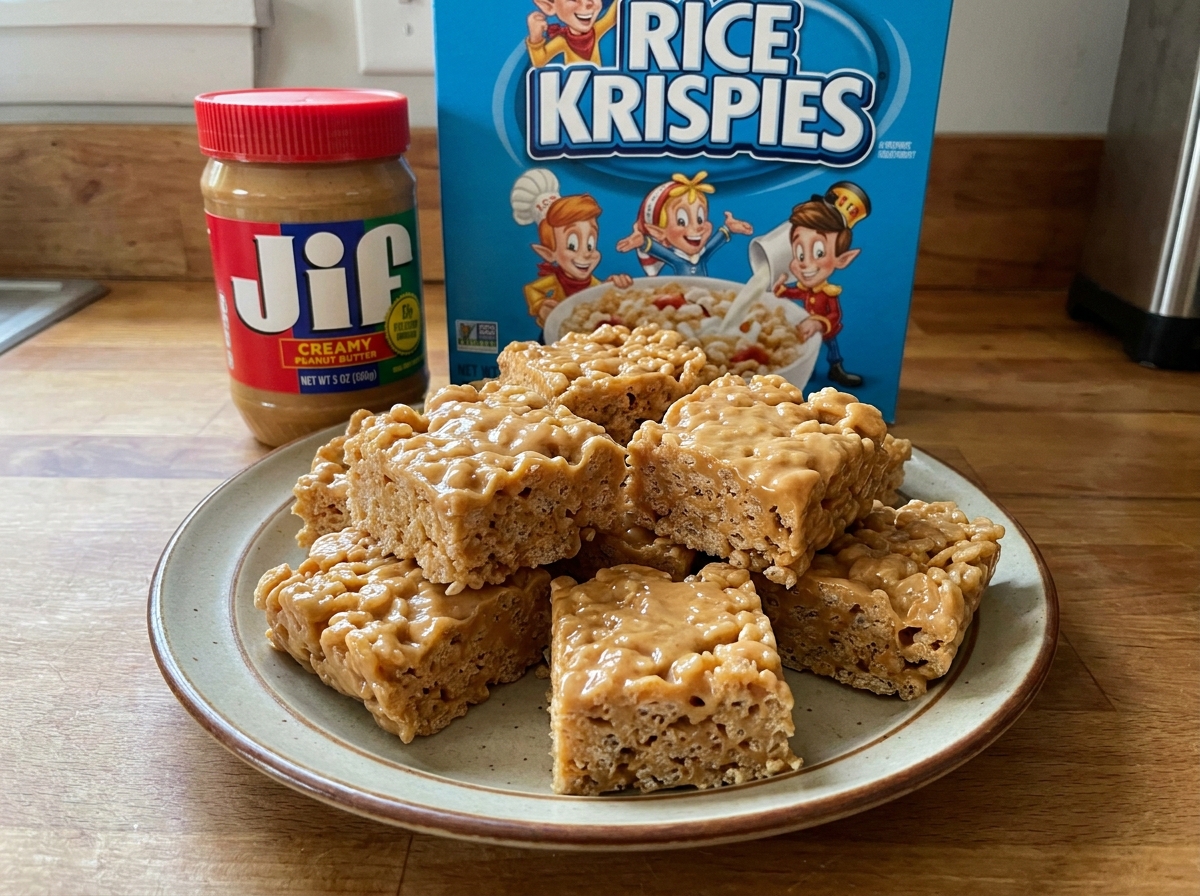
2-Ingredient Peanut Butter Rice Krispie Treats
Creamy peanut butter and crispy rice cereal, warmed, pressed, and chilled into crunchy, no-bake squares — no marshmallows, no butter, no oven required.
Thank you for reading this post, don't forget to subscribe!
There are some desserts that ask you to measure a dozen ingredients, preheat the oven, dirty several bowls, and wait patiently for everything to bake and cool. Then there are recipes like these 2-Ingredient Peanut Butter Rice Krispie Treats, which take a completely different approach.
With nothing more than creamy peanut butter and crispy rice cereal, you can create crunchy, nutty, satisfying squares without marshmallows, butter, corn syrup, or an oven. The peanut butter becomes the rich binder, coating every piece of cereal with a smooth layer that firms as the treats chill. It is a wonderfully simple idea, but sometimes simple is exactly what you need.
These treats are especially appealing when a dessert craving appears unexpectedly. You do not need advanced baking skills, specialized equipment, or a long list of pantry ingredients. The entire mixture comes together in minutes, and the refrigerator does the rest of the work. Traditional peanut butter Rice Krispie recipes often include marshmallows, butter, sugar, or other ingredients, but this streamlined version focuses on the natural combination of creamy peanut butter and crispy rice cereal.
2-Ingredient Peanut Butter Rice Krispie Treats are simple no-bake cereal bars made by combining warmed creamy peanut butter with crispy rice cereal, pressing the mixture into a pan, and chilling it until firm. Unlike classic marshmallow-based Rice Krispie treats, this version does not depend on melted marshmallows to hold the cereal together. Instead, smooth peanut butter coats the cereal and creates the rich, nutty base that binds the pieces together once chilled. The finished treats have a wonderful contrast between creamy peanut butter flavor and light, crispy cereal texture — sweet, savory, crunchy, and incredibly easy to customize.
The simplicity is also what makes this recipe so useful. You can make it when you have very little time, when the oven is already occupied, or when you simply want a dessert that does not create a mountain of dishes. Peanut butter and crisped rice cereal are also ingredients many people already keep in their pantry, which means this can become a reliable emergency dessert when unexpected guests arrive or when you need something quick for a lunchbox, snack table, or family gathering.
Why Two Ingredients Are Enough
At first glance, two ingredients may sound almost too simple to produce a proper dessert. But each ingredient has a specific job. The crispy rice cereal supplies structure and that unmistakable light crunch associated with Rice Krispie-style treats. The creamy peanut butter provides richness, flavor, moisture, and the coating that brings everything together. When warmed, peanut butter becomes smoother and more fluid, allowing it to spread around the cereal much more easily than it would at room temperature.
The key is not to think of peanut butter as merely a flavoring. In this recipe, it is the entire binding component, which is why choosing a peanut butter with a smooth, workable texture matters so much. Once the cereal is coated, the mixture is pressed into a lined pan and chilled. As the peanut butter firms, the cereal pieces become locked into a cohesive bar, with no need to introduce a separate syrup or marshmallow mixture. This is one of those recipes where removing ingredients does not necessarily remove enjoyment; instead, it highlights the two ingredients that matter most.
Why You’ll Love This No-Bake Dessert
There is an almost magical quality to a dessert that requires only two ingredients. These treats are quick, affordable, beginner-friendly, and easy to prepare in a small kitchen. They are particularly useful during warm weather because you do not have to turn on the oven, and they work well when you want children to participate in the kitchen, since the basic process involves melting, stirring, pressing, chilling, and cutting rather than complicated baking techniques.
Another reason to love these treats is their flexibility. The basic recipe is delicious on its own, but it also provides a blank canvas for toppings and mix-ins if you decide you want to go beyond two ingredients. A drizzle of melted chocolate can transform them into a peanut butter chocolate dessert. A sprinkle of flaky salt can emphasize the sweet-and-salty contrast. Mini chocolate chips, chopped peanuts, or colorful sprinkles can turn the same base into something more festive.
The texture is another major attraction. Some cereal bars can become overly hard or sticky, but this recipe is designed around the natural crunch of crispy rice cereal and creamy peanut butter. The result is more delicate than a dense candy bar while still being sturdy enough to pick up by hand. If you love the classic combination of peanut butter and something crispy, this recipe hits that craving with remarkably little effort.
A Quick Treat for Busy Days
Modern schedules often leave little room for elaborate desserts. That is where a recipe like this earns its place in your collection. You can prepare the pan, melt the peanut butter, stir in the cereal, press everything together, and put it into the refrigerator in just a few minutes. The listed preparation time is five minutes, with approximately two minutes of cooking time and 30 to 60 minutes of chilling.
That means the actual hands-on work is minimal. You are not waiting for a cake to bake or monitoring a saucepan full of sugar. You simply need to melt the peanut butter until it becomes smooth and pourable, and the refrigerator gives the mixture enough time to firm. This makes the recipe particularly convenient for last-minute desserts, afternoon snacks, school treats, and casual entertaining.
What You’ll Need
- 1 cup creamy peanut butterConventional, shelf-stable style works best
- 4 cups crispy rice cerealFresh and crisp, not stale
That’s it — no marshmallows, no butter, no corn syrup, no vanilla. Each treat comes out to roughly 145 calories, and the recipe makes 12 squares.
Choosing the Best Peanut Butter
For this particular recipe, creamy peanut butter is the easiest option. A conventional smooth peanut butter generally has a consistent texture and blends smoothly when warmed. Commercially processed peanut butter tends to be more stable for this style of treat than freshly ground peanut butter, which can separate and become oily.
Natural peanut butter can work in some versions, but its consistency varies considerably between brands. If the oil has separated in the jar, the peanut butter may not behave like a smooth, uniform binder. If you choose natural peanut butter, stir it extremely well before measuring so the solids and oils are properly combined.
Crunchy peanut butter is another possibility if you enjoy additional peanut texture, but it changes the character of the treats, and the peanut pieces can make the mixture slightly more difficult to press evenly. For the smoothest and most predictable result, creamy peanut butter is the safest choice.
Equipment You’ll Need
An 8-inch square baking pan gives you squares that are thick enough to hold together while staying easy to bite. Parchment paper, cut with enough overhang to create handles on two sides, makes lifting the finished slab out of the pan effortless. A large microwave-safe bowl is essential for melting the peanut butter gently, and a silicone spatula or large spoon helps you fold in the cereal without crushing it. A sharp chef’s knife gives you the cleanest cuts once the treats are fully chilled.
How to Make It
- Prepare the pan. Line an 8-inch square baking pan with parchment paper, leaving enough overhang on the sides to make lifting the finished treats easier. Lightly grease the parchment so the mixture releases cleanly.
- Melt the peanut butter. Place one cup of creamy peanut butter in a large microwave-safe bowl. Microwave in 20- to 30-second intervals, stirring between each, until smooth, warm, and pourable.
- Add the cereal. Add four cups of crispy rice cereal directly to the melted peanut butter.
- Fold gently. Using a silicone spatula or large spoon, gently fold the cereal into the peanut butter, scooping from the bottom and turning it over rather than stirring vigorously.
- Press into the pan. Transfer the mixture to your prepared pan and press it into an even layer, reaching into the corners.
- Chill. Refrigerate for 30 to 60 minutes, or until firm to the touch.
- Cut and serve. Lift the slab from the pan using the parchment overhang, place it on a cutting board, and cut into 12 squares.
How to Coat the Cereal Evenly
Once the cereal hits the warm peanut butter, work relatively quickly. Add all four cups at once and begin folding from the bottom of the bowl upward, rotating the bowl as you stir so you can reach cereal hiding along the sides and bottom. Do not mash or aggressively stir the cereal — it is delicate, and too much force can turn those beautiful crisp pieces into crumbs.
Instead, use slow folding motions: scoop underneath the mixture, lift it, and gently turn it over. Continue until you no longer see large patches of dry cereal. If a few tiny areas remain lightly coated, that is not necessarily a problem — the important thing is to distribute the peanut butter as evenly as reasonably possible. Once pressed and chilled, the mixture will become cohesive.

How to Get the Perfect Texture
Texture is where these simple treats either shine or disappoint. The first rule is to use fresh, crispy cereal — stale cereal will produce a softer, less satisfying result regardless of how carefully you prepare the peanut butter mixture. The second rule is to avoid overworking the cereal. You want the individual pieces to remain intact; the peanut butter should coat them, not pulverize them. Gentle folding gives you a mixture with plenty of visible crispy pieces.
The third rule is to avoid pressing the mixture too aggressively. Think of pressing the cereal into place rather than compacting it into a brick. You want enough pressure to make the squares hold together but not so much that every pocket of air disappears. Finally, allow enough chilling time. If the treats seem too soft immediately after assembly, do not assume the recipe has failed — refrigeration is an important part of the process because the peanut butter needs time to firm.
Troubleshooting Common Issues
My treats are falling apart instead of holding together. The mixture may not have been coated evenly, or you may have used too much cereal relative to the peanut butter. Pressing the mixture firmly enough into the pan and allowing adequate chilling time also helps the squares hold together.
My peanut butter turned oily or seized up instead of staying smooth. This usually happens with natural peanut butter that wasn’t fully stirred before measuring, or with peanut butter that was overheated. Stick with a conventional, well-stirred peanut butter and heat it in short intervals.
My cereal turned to crumbs instead of staying crisp. This comes from stirring too aggressively. Use slow, gentle folding motions rather than vigorous stirring, and stop as soon as the cereal looks evenly coated.
My squares stuck to the pan. This is almost always a sign the parchment paper was skipped or too little overhang was left. Line the pan fully and lightly grease the parchment before adding the mixture.
My treats never firmed up in the fridge. Give them more time — a full 60 minutes, especially in a warmer kitchen. If they were pressed very loosely, they may also need a slightly longer chill than a firmly packed batch.
How to Cut Clean Rice Krispie Squares
Clean cuts start with a properly chilled slab. If the treats are still soft, the knife can drag the cereal mixture instead of slicing through it, so give them additional refrigeration time if necessary. Use a sharp chef’s knife or another sturdy kitchen knife, lift the slab from the pan using the parchment, place it on a cutting board, and cut straight down rather than using a heavy sawing motion.
For 12 even servings, divide the 8-inch square into three sections in one direction and four sections in the other, creating 12 approximately equal squares. If you want smaller snack-size bites, simply cut each square in half again — smaller portions are especially useful for parties or dessert trays because guests can take one without committing to a large serving. Wiping the knife clean between cuts also helps keep the edges tidy, since peanut butter tends to accumulate on the blade.

Best Ways to Serve These
There is almost no wrong occasion for peanut butter Rice Krispie treats. They are casual enough for an ordinary weekday snack but attractive enough to serve at parties when dressed up with chocolate or toppings. They work especially well for bake sales, family gatherings, potlucks, lunchboxes, movie nights, birthday parties, and holiday dessert tables, and their small size makes them easy to transport.
Because they do not require an oven, they are particularly convenient during warm months, letting you prepare them without heating your kitchen. They are also a great option when you need a quick homemade treat but do not want to spend an hour baking — the recipe gives you that homemade feeling with almost no preparation.
These treats are naturally suited to children, too, because they are small, handheld, crunchy, and sweet. They can be packed into lunchboxes, served as an after-school snack, or placed on a dessert tray at a family gathering. For birthdays, cut the chilled slab into smaller squares so each guest receives a bite-sized portion, and drizzle the finished treats with chocolate or add colorful sprinkles to match a party theme. If children are helping in the kitchen, an adult should handle the hot peanut butter, but kids can help fold the cereal once the mixture has cooled enough to handle safely, and can assist with decorating the finished squares.
Because this recipe contains peanut butter, always consider your guests’ allergy needs before serving it, and clearly label the treats when bringing them to shared events, schools, or workplaces where peanut allergies may be a concern.
A Few Ways to Make It Yours
Chocolate Drizzle
Melt milk, dark, or white chocolate and drizzle it over the chilled squares, then let it firm before serving for a classic candy-bar finish.
Mini Chocolate Chips
Sprinkle mini chocolate chips into the warm mixture before pressing it into the pan, so they soften slightly and create little pockets of chocolate.
Salted Peanut Butter
Finish the chilled squares with a light sprinkle of flaky sea salt to emphasize the classic sweet-and-salty contrast.
Chopped Peanuts & Coconut
Press chopped peanuts or shredded coconut into the top of the mixture before chilling for extra crunch and texture.
Keep in mind that once you introduce additional ingredients, the recipe is no longer technically a two-ingredient treat — and that’s perfectly fine if your goal is customization rather than maintaining the strict two-ingredient format.
Make-Ahead and Storage Tips
These treats are excellent for making ahead because they do not need to be served immediately. Once fully chilled and cut, store them in an airtight container with parchment between layers if you stack them. For the best texture, keep them protected from excess air and moisture, since exposure to air can gradually reduce the cereal’s crispness. A tightly sealed container helps preserve the contrast between creamy peanut butter and crispy cereal.
Peanut butter itself has a relatively long pantry life; the USDA’s Food Safety and Inspection Service states that unopened peanut butter can generally be kept in the pantry for six to nine months, while opened peanut butter can generally be kept for two to three months. The storage life of the finished treats, however, depends on the entire recipe and the freshness of the cereal, so they are best enjoyed while the texture remains crisp. If you’re preparing them for an event, making them the day before is a convenient option — chill them thoroughly, cut them into squares, and keep them covered until serving.
Can You Freeze These Treats?
You can freeze these peanut butter cereal bars, although freezing is not necessary for most occasions. If you decide to freeze them, cut the chilled slab into individual squares first, then wrap the squares separately or place parchment between layers inside a freezer-safe airtight container. Freezing can be useful when you want to prepare a larger batch ahead of time.
Allow the treats to thaw while still covered so condensation does not collect directly on their surface. Once thawed, they may be slightly different in texture from freshly made treats, particularly if moisture has entered the container. For the best overall crunch, making a batch a day or two ahead is generally simpler than freezing, since the recipe is so quick that you can prepare it shortly before you need it.
Why This Recipe Is Great for Beginners
Recipes with long ingredient lists can intimidate new cooks. This one removes most of those barriers — there are only two ingredients, the measurements are simple, and the cooking technique is straightforward. You are essentially learning four fundamental kitchen skills: gently heating an ingredient, combining ingredients without damaging their texture, pressing a mixture into a pan, and judging when a chilled dessert is firm enough to cut.
There is also plenty of room for imperfection. If your squares are not perfectly symmetrical, they will still taste delicious. If the cereal is not arranged in an absolutely uniform layer, the finished treats will still be recognizable and enjoyable. That makes this a particularly approachable recipe for beginners, teenagers learning to cook, or anyone who wants a low-stress homemade dessert.
Common Questions
Can I use crunchy peanut butter?
Yes, crunchy peanut butter can be used if you enjoy extra peanut pieces. However, creamy peanut butter produces the smoothest coating and is generally easier to mix evenly with the cereal.
Do I need marshmallows?
No. This particular recipe is intentionally made without marshmallows. The warmed peanut butter serves as the binder, creating a simple alternative to traditional marshmallow-based cereal treats.
Can I use another crispy cereal?
Yes. Another puffed or crispy rice cereal can work, although the texture and sweetness may vary by brand. The important thing is choosing a cereal that is fresh and crisp.
Why are my treats falling apart?
The mixture may not have been coated evenly, or you may have used too much cereal relative to the peanut butter. Pressing the mixture firmly enough into the pan and allowing adequate chilling time can also help the squares hold together.
Can I add chocolate?
Absolutely. Chocolate and peanut butter are a classic combination. Try drizzling melted chocolate over the chilled treats or sprinkling mini chocolate chips into the mixture before pressing it into the pan.
How long do these treats last?
For the best texture, keep the treats in an airtight container and enjoy them while the cereal remains crisp. Properly protected storage helps prevent moisture from softening the cereal.
Can I make these in a larger pan?
Yes. A larger pan will create thinner treats, while a smaller pan will produce thicker squares. If you change the pan size substantially, adjust the thickness according to your preference rather than changing the ingredient ratio.
Can I make these without a microwave?
Yes. Warm the peanut butter gently in a saucepan over low heat, stirring frequently until smooth and pourable, then remove it from the heat before adding the cereal.
Why should I use parchment paper?
Parchment makes the chilled slab much easier to remove from the pan. The overhang also gives you convenient handles for lifting the entire block onto a cutting board before slicing.
Are these the same as traditional Rice Krispie treats?
Not exactly. Traditional Rice Krispie treats commonly use melted marshmallows and butter as the binder. This version skips those ingredients entirely and relies on creamy peanut butter to coat and hold the crispy rice cereal together.
2-Ingredient Peanut Butter Rice Krispie Treats are exactly the kind of recipe that deserves a permanent place in a quick-dessert collection. With only creamy peanut butter and crispy rice cereal, you can make a crunchy, nutty, satisfying no-bake treat without marshmallows, butter, corn syrup, or an oven — and the real appeal is the combination of convenience and texture: rich, creamy coating against a light, crispy crunch. It’s quick enough for a weekday craving, easy enough for beginners, and versatile enough for parties, lunchboxes, bake sales, and holiday trays. Sometimes the best recipes aren’t the ones with the longest ingredient lists; sometimes all you need is peanut butter, crispy cereal, and a few minutes to create something everyone wants to grab from the dessert plate.