
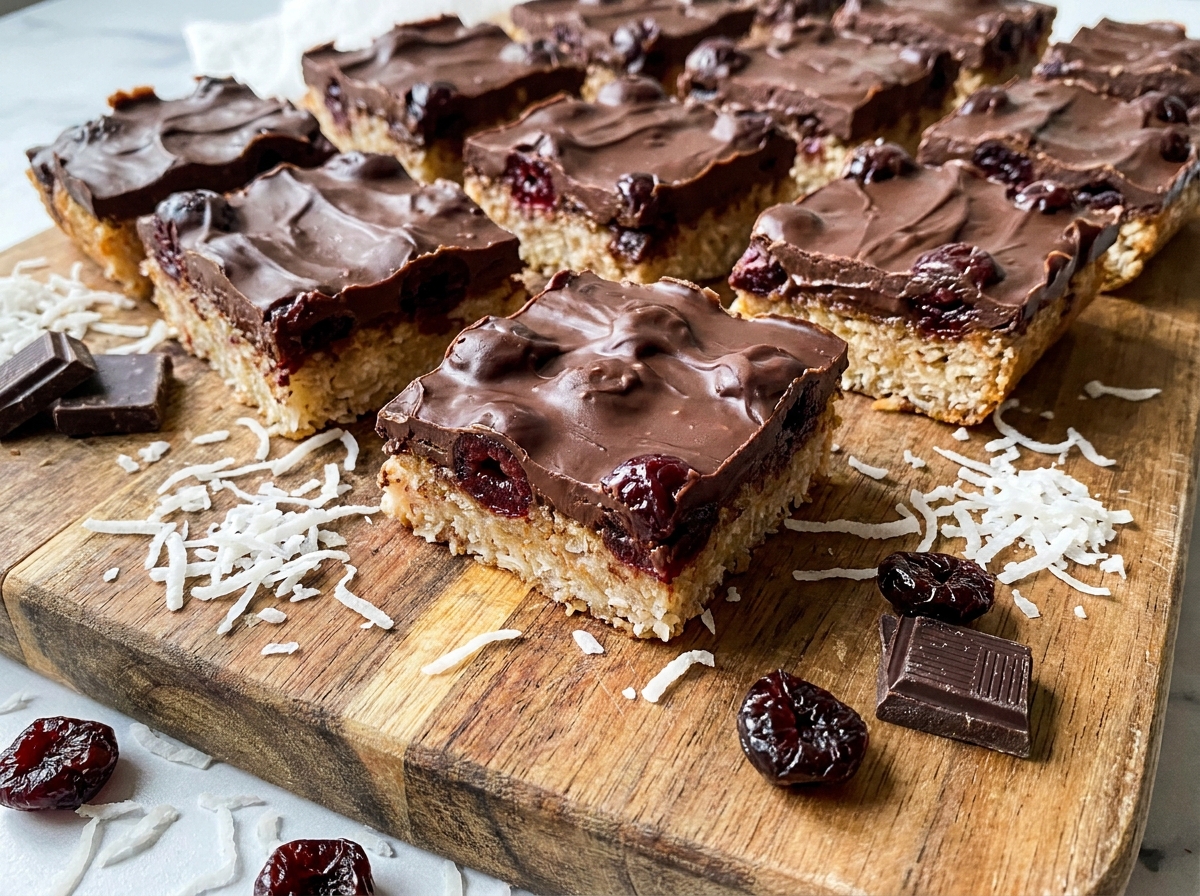
3-Ingredient Chocolate Cherry Coconut Bars
Cherry pie filling layered under toasted coconut and melted chocolate chips — a warm, fruity bar that bakes into something between a cobbler and a candy bar.
Thank you for reading this post, don't forget to subscribe!
Cherry, coconut, and chocolate is one of those flavor combinations that shows up in candy bars and holiday desserts alike, and these 3-Ingredient Chocolate Cherry Coconut Bars bring all three together in one simple pan. A layer of cherry pie filling goes on the bottom, shredded coconut goes over that, and chocolate chips finish the top before the whole thing goes into the oven.
There’s no dough to make, no creaming butter and sugar, and no mixing bowl required at all — you’re essentially layering three ingredients directly into the pan. As it bakes, the coconut toasts to a light golden color, the chocolate chips soften and partially melt over the top, and the cherry filling underneath turns warm and jammy, bubbling slightly at the edges.
The result is a bar with a soft, fruity base, a chewy coconut layer, and a rich chocolate top — something between a fruit cobbler and a candy bar. It’s an easy dessert for a potluck or holiday table, since a can of pie filling and a bag of coconut are easy to keep on hand, and the whole thing comes together with about five minutes of actual assembly before the oven takes over.
Why These Three-Ingredient Bars Are So Easy
The entire method here is layering rather than mixing. Cherry pie filling goes into the pan first, coconut is scattered over the top of that, and chocolate chips finish the layering before the pan goes into the oven. There’s no batter to prepare and no need to worry about creaming, folding, or overmixing anything — you’re simply building layers directly in the baking pan. That makes this one of the most hands-off bar recipes to put together, since the actual assembly takes only a few minutes and the oven does the rest of the work turning three separate ingredients into a unified bar.
Because the recipe relies on just three ingredients, each one plays a clear, distinct role. The cherry pie filling supplies moisture, sweetness, and fruit flavor as the base layer. The shredded coconut adds texture and toasts as it bakes, developing a light golden color and a slightly chewy, slightly crisp bite. The chocolate chips melt into a rich topping that ties the cherry and coconut layers together with a final layer of chocolate flavor.
A Baked Bar With Cherry, Coconut, and Chocolate in Every Bite
Layering rather than mixing means each bite of these bars carries a little of all three ingredients rather than one uniform flavor throughout. The bottom layer stays soft and fruity, similar to a baked pie filling, while the coconut on top toasts into a slightly crisp, chewy layer, and the chocolate melts down into the coconut, binding the top together. Cutting into a baked pan reveals all three layers clearly, which makes for an appealing presentation even though the recipe itself couldn’t be simpler to assemble.
Why Cherry, Coconut, and Chocolate Work So Well Together
Cherry and chocolate is already a classic pairing, showing up in everything from chocolate-covered cherries to Black Forest cake, thanks to the way the tartness of the cherries balances the sweetness of the chocolate. Coconut adds a third dimension to that pairing — its natural sweetness and slightly nutty, toasted flavor bridge the tart fruit and the rich chocolate, while its texture gives the bars some welcome chew and contrast against the softer cherry layer underneath. Together, the three ingredients create a bar that tastes more complex and put-together than the short ingredient list and simple layering method would suggest.
What You’ll Need
- 1 can (21 oz) cherry pie filling
- 2 cups sweetened shredded coconut
- 2 cups semisweet chocolate chips
That’s the entire ingredient list. Each bar comes out to roughly 275 calories, and the recipe makes 12 bars.
Choosing the Best Pie Filling and Coconut
A standard 21-ounce can of cherry pie filling is the easiest option here, since it’s already thickened and sweetened, ready to spread straight into the pan without any additional prep. Sweetened shredded coconut gives the top layer more sweetness and a softer bite than unsweetened coconut, though unsweetened will work if you’d prefer a less sugary bar overall — just know the flavor balance will shift slightly toward the tart cherry layer. For the chocolate, semisweet chocolate chips are a reliable middle ground between the sweetness of the cherry filling and the coconut, though dark chocolate chips will pull the bars in a richer, less sweet direction if that’s more to your taste.
Equipment You’ll Need
An 8×8-inch baking pan is the right size for these bars, giving each layer enough depth to bake through evenly. Line it with parchment paper, leaving a little overhang on two sides, so the finished slab lifts out cleanly once it’s cooled. Beyond the pan itself, you don’t need any mixing equipment — a spatula or the back of a spoon is enough for spreading the pie filling into an even layer, and a sharp knife, wiped clean between cuts, gives you the neatest bars once everything has cooled.
How to Make It
- Preheat and prep. Preheat the oven to 350°F (175°C) and line an 8×8-inch baking pan with parchment paper.
- Add the cherry filling. Spread the cherry pie filling evenly over the bottom of the prepared pan.
- Layer the coconut. Sprinkle the shredded coconut evenly over the cherry filling, covering it as fully as possible.
- Top with chocolate. Scatter the chocolate chips evenly over the coconut layer.
- Bake. Bake for 25 to 30 minutes, or until the edges are bubbly and the coconut is lightly golden.
- Cool completely. Let the bars cool completely in the pan before slicing; the layers firm up as they cool.
Layer the Pan Evenly
Because there’s no batter to bind the layers together, getting an even spread at each step matters more than it does in some other bar recipes. Use an offset spatula or the back of a spoon to spread the cherry pie filling in a consistent layer all the way to the corners of the pan before adding the coconut — a thin spot in the cherry layer can leave a section of the bars dry once baked. When you add the coconut, scatter it evenly rather than piling it in the center, so every bar gets a similar amount of coconut in the finished pan. The chocolate chips can be a little more casual, since they’ll melt and spread somewhat on their own as they bake, but an even distribution still gives you a more consistent finished bar.

Bake Until the Coconut Turns Golden
The visual cue to watch for here is the coconut on top, which should turn a light golden color once it’s toasted, along with some gentle bubbling at the edges of the pan where the cherry filling is cooking through. Ovens vary, so start checking around the 25-minute mark rather than waiting for the full 30 minutes to elapse. If the coconut looks like it’s browning too quickly while the center still needs more time, loosely tenting the pan with foil for the remaining bake time will slow down further browning without stopping the bake.
Cool Completely Before Slicing
These bars need a full cooling period before they’re ready to slice, since the cherry filling and melted chocolate are both quite loose straight out of the oven. Let the pan cool to room temperature, then consider refrigerating it for 30 minutes to an hour to help the chocolate layer firm up further, which makes for cleaner slices. Use the parchment overhang to lift the whole slab out of the pan before cutting, and use a sharp knife wiped clean between cuts, since the chocolate and cherry filling can both cling to the blade.
Tips for Perfect Cherry Coconut Bars
Spread the cherry pie filling into a fully even layer before adding the coconut, since any thin spots can leave parts of the bar drier than the rest. Watch the coconut closely near the end of baking, since it can go from perfectly toasted to overly dark in just a couple of minutes. Let the bars cool completely, and consider a short stint in the refrigerator, before slicing for the cleanest cuts. If you’d like a more pronounced coconut flavor, toasting the coconut lightly in a dry skillet before layering it into the pan adds even more toasted flavor to the finished bars.
Troubleshooting Common Issues
My coconut burned before the bars finished baking. Tent the pan loosely with foil partway through baking next time, and start checking a few minutes earlier than the suggested time.
My bars were soggy in the middle. This usually means they needed more time in the oven, or weren’t given enough time to cool and set afterward. Bake until the edges are visibly bubbly, and let the pan cool completely, ideally with a stint in the refrigerator, before slicing.
My layers separated when I cut into the bars. Because there’s no binding batter, some separation between layers is normal, especially if the bars are sliced before they’ve fully cooled. Chilling the pan before cutting helps the layers hold together better.
My chocolate looked dull instead of glossy after baking. This can happen if the chocolate chips were exposed to a lot of direct heat. It doesn’t affect the flavor, though covering the pan loosely with foil for the last few minutes of baking can help preserve a glossier finish.
My bars are too sweet. Try using unsweetened shredded coconut and a darker chocolate chip next time to cut back on the overall sweetness while keeping the same basic method.

A Few Ways to Make It Yours
Toasted Coconut Finish
Toast a little extra shredded coconut separately and sprinkle it over the top after baking for more toasted flavor and a prettier presentation.
Chocolate Drizzle
Melt a little extra chocolate and drizzle it over the cooled bars in thin lines for a bakery-style finish.
Chopped Almonds
Scatter chopped almonds over the coconut layer before baking for a Black-Forest-inspired crunch alongside the cherry and chocolate.
Dark Chocolate Swap
Use dark chocolate chips instead of semisweet for a richer, less sweet bar that balances the tart cherry filling even further.
Try the classic three-ingredient version first so you have a baseline for texture and sweetness, then decide whether any of these additions are worth making part of your regular routine.
How to Store Chocolate Cherry Coconut Bars
Store the bars in an airtight container in the refrigerator, where the fruit filling keeps best, for up to about 5 days. They can also be kept at room temperature for a day if your kitchen isn’t too warm, though refrigeration helps the chocolate layer and cherry filling both stay firmer and easier to handle. Layer parchment or wax paper between stacked bars to keep them from sticking together. These bars also freeze reasonably well — wrap individual pieces tightly and thaw in the refrigerator before serving.
When to Serve These Easy Bars
These bars are especially well suited to holiday tables and potlucks, where the cherry and chocolate combination feels a little festive without requiring much effort. They also work well for a casual dessert table, a bake sale, or any gathering where a fruity, chocolatey bar would be a welcome addition alongside other treats. Because they need a full cooling period, they’re naturally suited to being made ahead of an event, and a short chill in the refrigerator before serving makes them easier to transport and slice cleanly once you arrive.
Nutrition and Serving Information
The recipe estimates approximately 275 calories per bar when the pan is divided into 12 pieces. This is only an estimate, since the specific brands of pie filling, coconut, and chocolate chips used will affect the exact sugar and calorie content. Cutting the bars into smaller or larger pieces changes the calories per serving accordingly. Because the recipe leans on a sweetened pie filling, sweetened coconut, and chocolate, it’s a fairly indulgent treat best enjoyed in moderation, and smaller portions can help these fit into a broader spread of desserts at a gathering. Check ingredient labels for tree nut allergens, since coconut and some chocolate products are processed in facilities that handle a variety of nuts.
Make-Ahead Tips
Because these bars need a full cooling period, and benefit from a chill in the refrigerator besides, they’re naturally suited to being made a day ahead of when you plan to serve them. Bake and cool the pan completely, keep it covered in the refrigerator, and slice close to serving time so the cut edges look their freshest. If you’re bringing the bars somewhere, transporting the uncut, chilled slab and slicing on arrival keeps the layers looking neat.
A Little Bit of History
Cherry and chocolate as a pairing has deep roots in dessert traditions, most famously in Black Forest cake, a German dessert built around layers of chocolate cake, whipped cream, and cherries, and in chocolate-covered cherry candies that have been a holiday staple in candy boxes for generations. Coconut has its own long history in baking, especially in bar-cookie form, where shredded coconut is often toasted and layered over a sweet base for texture and flavor, as seen in classic seven-layer or magic bars. This recipe borrows a little from both traditions, combining the cherry-and-chocolate pairing with the toasted-coconut-topped bar format, but simplifies the whole thing down to three ingredients and a single layering step. Where a magic bar traditionally involves a graham cracker crust, sweetened condensed milk, and several mix-ins layered together, this version strips the format down to just the essentials, relying on the natural thickness of canned pie filling to do the work a crust and condensed milk might otherwise do.
Portioning and Yield
This recipe fills an 8×8-inch pan and is typically cut into 12 bars, which is a satisfying size given how rich the chocolate and coconut topping is over the fruity cherry base. If you’re serving a crowd or adding these to a holiday dessert table alongside other treats, cutting the pan into 16 smaller squares stretches the batch further while still giving everyone a taste of all three layers. For a more substantial dessert served on its own, perhaps warmed slightly and topped with a scoop of vanilla ice cream, cutting the pan into 9 larger pieces gives you a heartier portion. To double the recipe for a bigger gathering, use two cans of pie filling, four cups of coconut, and four cups of chocolate chips in a 9×13-inch pan, and check the coconut a few minutes earlier than you would for the smaller pan, since it can toast slightly faster in a wider dish.
Serving Suggestions
These bars are rich enough to stand on their own, but a few simple additions can turn them into a more complete dessert. A scoop of vanilla ice cream alongside a slightly warmed bar plays up the contrast between the cold cream and the soft, fruity filling, similar to serving a warm cobbler. A dollop of freshly whipped cream and a few extra fresh cherries on the side make for a pretty, low-effort plated dessert if you’re serving these at a sit-down meal rather than setting them out on a tray. For a coffee or tea table, cutting the bars into smaller, bite-sized squares makes them easy to enjoy alongside a hot drink without committing to a full-sized portion.
Common Questions
Can I use a different pie filling?
Yes, blueberry, raspberry, or apple pie filling would all work with the same layering method, though the flavor pairing with coconut and chocolate will change accordingly. Cherry is the classic choice alongside chocolate for a reason, but this is an easy recipe to adapt.
Do I need sweetened coconut?
No, unsweetened shredded coconut works too, though the bars will be noticeably less sweet overall, with the tart cherry flavor coming through more strongly.
Can I freeze these bars?
Yes, though the texture of the cherry filling may soften slightly after thawing. Wrap individual bars tightly and thaw them in the refrigerator before serving.
Why did my coconut burn?
Coconut toasts quickly and can go from golden to overly dark in just a couple of minutes. Start checking the pan a few minutes before the earliest suggested bake time, and tent it loosely with foil if it’s browning faster than the rest of the bar is baking.
Do I need to bake these, or can I make a no-bake version?
This particular recipe relies on baking to toast the coconut and melt the chocolate into the layers below. A no-bake version would need a different approach, such as melting the chocolate separately and folding all three ingredients together before chilling instead of baking.
Can I add nuts to this recipe?
Yes, chopped almonds or pecans scattered over the coconut layer before baking add extra crunch and pair well with the cherry and chocolate flavors, though the recipe will no longer be strictly three ingredients once you add them.
3-Ingredient Chocolate Cherry Coconut Bars turn a can of pie filling, a bag of coconut, and a bag of chocolate chips into a warm, layered dessert with almost no hands-on effort. Layer the three ingredients into a pan, bake until the coconut turns golden, and let the bars cool before slicing into a fruity, chewy, chocolate-topped treat. It’s proof that a short ingredient list and a simple method can still produce a bar that tastes like it took a lot more effort than it actually did.