
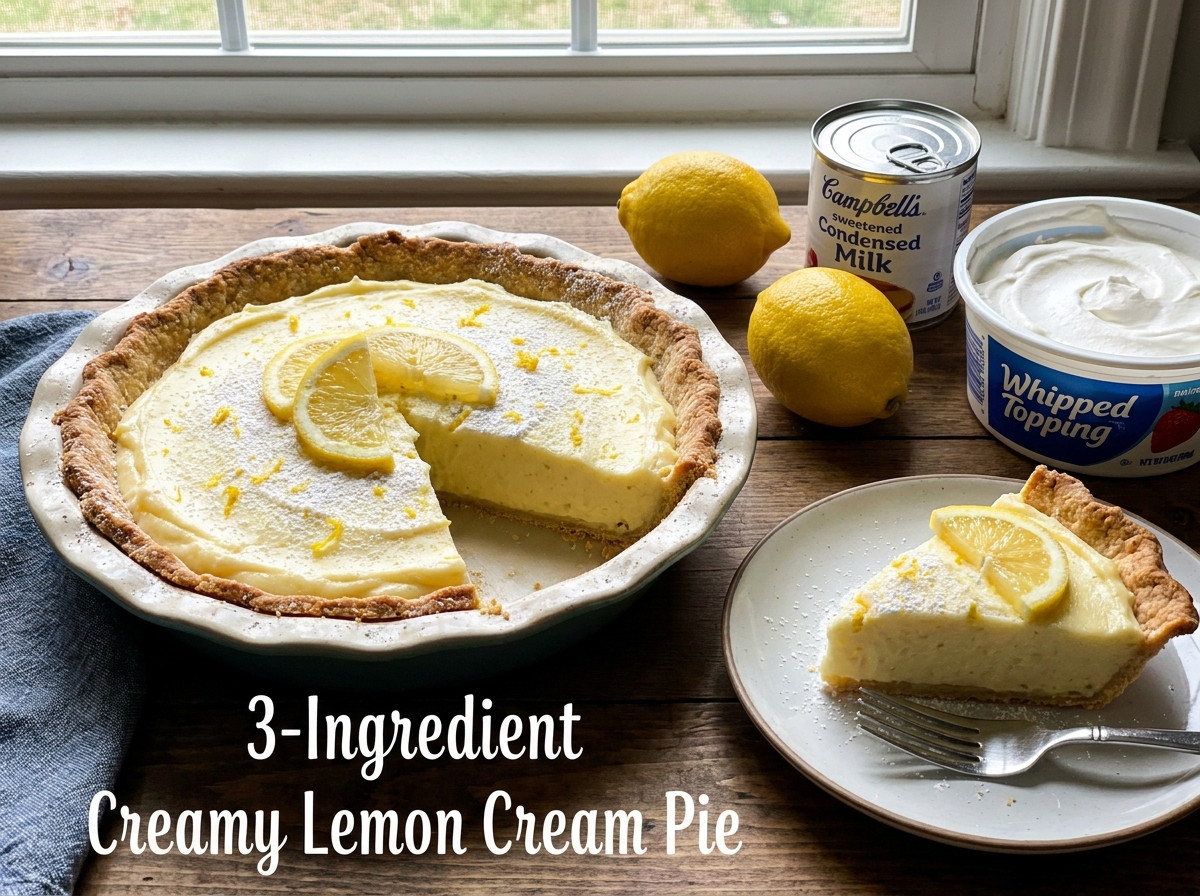
3-Ingredient Creamy Lemon Cream Pie
Sweetened condensed milk and fresh lemon juice whisked into a graham cracker crust and chilled until set — bright, creamy, and refreshingly tangy, with no oven and no baking required at all.
Thank you for reading this post, don't forget to subscribe!
This 3-Ingredient Creamy Lemon Cream Pie turns a prepared graham cracker crust, a can of sweetened condensed milk, and fresh lemon juice into a bright, tangy pie with a smooth, creamy filling. Whisked together in one bowl and poured straight into the crust, the filling needs nothing more than a few hours in the refrigerator to set into clean, sliceable pieces.
There’s no baking, no eggs, and no cooking on the stovetop. The acid in the fresh lemon juice reacts with the proteins in the sweetened condensed milk to thicken the filling on its own, the same chemistry behind classic key lime pie, which is what allows this pie to set up fully in the refrigerator without ever seeing an oven.
Because the filling comes together in a single bowl with just a whisk, this is one of the simplest pies to make from scratch, and the bright, citrusy flavor makes it a natural choice whenever a lighter, tangier dessert feels right.
Why This Recipe Works
Sweetened condensed milk is thick, rich, and full of milk proteins, and those proteins are the key to how this pie sets without baking. When fresh lemon juice, which is naturally acidic, is whisked into the condensed milk, that acidity causes the milk proteins to denature and loosen their structure slightly, thickening the mixture as it sits. Refrigeration slows everything down and lets that thickening finish gradually and evenly, giving the filling ample, unhurried time to firm up into a smooth, sliceable pie rather than staying loose and thin.
Pouring the filling into a prepared graham cracker crust means there’s no crust to make from scratch either, which is a big part of why this recipe comes together so quickly. The crust’s slightly sweet, crumbly texture also provides a nice contrast to the smooth, tangy filling, rounding out the pie with almost no additional effort.
Why Fresh Lemon Juice Matters Here
Fresh lemon juice brings both the acidity needed to thicken the condensed milk and a brighter, more rounded citrus flavor than bottled juice typically offers. Bottled lemon juice often carries a slightly duller, more one-note tartness due to processing and preservatives, while juice squeezed directly from fresh lemons tends to taste cleaner and more vibrant once it’s balanced against the sweetness of the condensed milk.
What You’ll Need
- 1 prepared 9-inch graham cracker crust
- 1 can (14 oz) sweetened condensed milk
- 1/2 cup fresh lemon juice
That’s the entire list. Each slice comes out to roughly 320 calories, and the recipe makes 8 slices.
A Note on Lemons and Crust
You’ll need roughly 3 to 4 medium lemons to get a full half cup of fresh juice, depending on their size and juiciness; rolling the lemons firmly on the counter before cutting them helps release more juice. A standard store-bought graham cracker crust works perfectly here and is what keeps this recipe to just three ingredients, though a homemade graham crust will work just as well if you’d rather make your own.
Equipment You’ll Need
A large mixing bowl and a whisk are all you need to bring the filling together; no mixer or blender is required since the condensed milk and lemon juice combine smoothly with just a bit of hand-whisking. A citrus juicer or reamer makes quick work of juicing the lemons, and a flexible rubber spatula helps scrape every last bit of filling out of the mixing bowl and into the waiting crust.
How to Make It
- Whisk the filling. In a large bowl, whisk the sweetened condensed milk and fresh lemon juice until smooth and creamy.
- Fill the crust. Pour the lemon mixture into the prepared graham cracker crust.
- Smooth the top. Smooth the top with a spatula.
- Chill. Refrigerate for at least 4 hours, or until completely set.
- Serve. Slice and serve chilled.
Getting a Smooth, Lump-Free Filling
Whisking the condensed milk and lemon juice together thoroughly, rather than just stirring, helps the mixture come together into a completely smooth, uniform filling with no streaks of unmixed condensed milk. The mixture will noticeably thicken as you whisk, going from a thin, pourable consistency to something closer to a light pudding within a minute or two, which is a good visual sign that the lemon juice is doing its job.

Whisking to the Right Consistency
The filling should look completely smooth and slightly thickened by the time it goes into the crust, similar to a loose pudding rather than a thin liquid. If it still looks thin and runny after a minute or two of whisking, give it another minute; the reaction between the lemon juice and condensed milk needs a little time and agitation to fully take hold before the filling goes into the crust.
Knowing When It’s Set
The pie needs the full 4 hours in the refrigerator to set completely, and overnight is even better if you have the time. A properly and fully set pie should hold a clean, neat slice without the filling oozing, spreading, or slumping on the plate. If a slice looks soft or slumps noticeably when cut, give the whole pie another hour or two of extra chilling before trying again.
Tips for Perfect Lemon Cream Pie
Use fresh lemon juice for the best flavor and the most reliable thickening, and whisk the filling thoroughly until it visibly thickens before pouring it into the crust. Give the pie the full chill time, or longer, before slicing, since a rushed pie will be noticeably softer and harder to cut cleanly.
Troubleshooting Common Issues
My pie didn’t set firm enough. This usually means it needs more chill time; give it a few extra hours, or overnight, before slicing again.
My filling tasted too tart. Using a bit less lemon juice, or a slightly sweeter crust, can help balance a filling that tastes too tangy for your preference.
My filling looked curdled instead of smooth. This can happen if the lemon juice is added too quickly without enough whisking; whisk continuously and steadily as you combine the two ingredients.
My crust got soggy. A very wet filling or a long chill time can soften a delicate crust slightly; this is normal and doesn’t affect the flavor, though a sturdier crust will hold up a bit better over several days.

A Few Ways to Make It Yours
Whipped Topping Finish
Top the chilled pie with whipped topping or fresh whipped cream right before serving for a classic finished look.
Lemon Zest Garnish
Sprinkle fresh lemon zest over the top for extra citrus aroma and a pop of color.
Graham Crumb Topping
Sprinkle a few extra graham cracker crumbs over the top for added crunch and a more rustic look.
Berry Topping
Add a handful of fresh berries on top for a bright, colorful contrast to the pale yellow filling.
The plain three-ingredient version is worth trying first so you know the baseline flavor and texture before adding any extras.
How to Store Lemon Cream Pie
Store the pie covered in the refrigerator for up to 4 days, since the filling is dairy-based and needs to stay cold. It doesn’t freeze particularly well, since the texture of the filling can separate slightly once thawed, so this is best enjoyed fresh within a few days of making it.
When to Serve This Pie
This pie works well as a light, refreshing dessert after a heavier meal, since the bright citrus flavor feels less rich than a chocolate or caramel-based dessert. It’s also a good choice for a warm-weather gathering or a spring and summer occasion, when a cold, tangy dessert feels more appealing than something dense and baked.
Nutrition and Serving Information
The recipe estimates approximately 320 calories per slice when the pie is divided into 8 pieces, based on a standard graham cracker crust and canned sweetened condensed milk. This is only an estimate, since exact calorie and fat content will vary depending on the specific brands used. This recipe contains dairy from the condensed milk and gluten from the graham cracker crust, so check labels carefully if you’re serving guests with either of those sensitivities.
Make-Ahead Tips
This pie is an excellent make-ahead dessert, since it needs at least 4 hours to set anyway and actually holds up well in the refrigerator for a day or two before serving. Make it the night before a gathering so it has plenty of time to fully set, and add any toppings like whipped cream or lemon zest right before serving so they look their freshest.
The Science Behind a No-Bake Set
Sweetened condensed milk is milk that’s had most of its water removed and sugar added, leaving a thick, protein-rich base. When an acid like fresh lemon juice is introduced, it lowers the pH of the mixture, which causes the milk proteins, mainly casein, to partially unfold and link together into a looser network, similar to what happens when milk curdles, but in a much more controlled, gentle way thanks to the high sugar content buffering the reaction. This protein network is what thickens the filling and eventually sets it firm enough to slice, all without ever applying heat. This is the exact same chemistry behind a classic key lime pie, just using lemon juice instead of lime.
Portioning and Yield
This recipe makes one 9-inch pie, yielding about 8 standard slices, a good amount for a family dinner or a small gathering. If you’d like smaller portions for a larger crowd, cutting the pie into 10 or 12 thinner slices stretches it further while still giving everyone a satisfying taste. The recipe doesn’t scale up easily in a single crust, so for a bigger batch, making two full pies in two separate crusts is the more reliable approach than trying to squeeze extra filling into a single standard-sized pan.
A Little Bit of History
Condensed milk pies built around fresh citrus juice date back to the mid-20th century, when sweetened condensed milk became a pantry staple in many American kitchens and home cooks discovered that mixing it with an acidic juice created a filling that set without any cooking at all. Key lime pie is the most famous example of this technique, but the same basic method works with lemon juice just as well, producing a slightly different, often brighter flavor profile. This lemon version carries that same no-bake tradition forward, relying on the identical chemistry while swapping in a different citrus for a slightly different, equally refreshing result.
Serving Suggestions
Serve this pie chilled, straight from the refrigerator, with a dollop of whipped topping and a thin slice of lemon on top for a simple, classic presentation. A few fresh berries scattered around the plate add color and a complementary tartness if you’re plating individual slices for a dinner party. For a more casual setting, the pie also holds up well served straight from the pan with a stack of plates and forks set out alongside it.
Why This Recipe Is a Good Introduction to No-Bake Pies
Because the entire filling comes together with just a whisk and a bowl, and the crust is already prepared, this is one of the most approachable no-bake pies for someone who hasn’t made one before. There’s no tempering, no gelatin to bloom, and no risk of overcooking anything on the stovetop, which removes most of the common failure points that trip people up with other custard or cream pie recipes. Once you’ve made this version successfully, the same basic technique, condensed milk plus an acidic juice, opens the door to other citrus variations without much additional learning curve.
Understanding the Texture
The finished filling is dense, creamy, and smooth, closer to a rich pudding than to a light, airy mousse. That density comes directly from the concentrated milk solids in the condensed milk, which don’t get diluted or lightened the way they would in a recipe that also calls for whipped cream folded into the filling. Once you know to expect a rich, substantial slice rather than a fluffy one, the texture reads as indulgent and satisfying rather than heavy, especially against the bright pop of the lemon flavor cutting through it.
Choosing the Right Lemons
Standard Eureka or Lisbon lemons, the most common variety found in grocery stores, give a classic, bright tartness that works perfectly in this recipe. Meyer lemons, which are slightly sweeter and less acidic, will produce a milder, less tangy pie and may need a touch more lemon juice to achieve the same level of brightness. Whichever variety you use, look for lemons that feel heavy for their size and have smooth, thin skin, since these tend to be juicier and will get you to that half cup of fresh juice using noticeably fewer lemons overall.
Why This Recipe Is Naturally Kid-Friendly to Make
With no oven, no raw eggs, and no hot stovetop involved anywhere in the process, this is an easy recipe to make alongside kids, whether that means letting them measure the condensed milk or handing them the job of whisking the filling together until it thickens. Watching the mixture visibly change from thin and pourable to noticeably thicker over just a minute or two of whisking is genuinely fun to see, and it gives a young helper a real, visible sense of the science happening in the bowl without any risk of burns or hot equipment.
Adjusting Tartness to Your Taste
If you prefer a milder, less tangy pie, starting with a slightly smaller amount of lemon juice, closer to a third of a cup, and tasting the filling before pouring it into the crust lets you dial in the tartness to your own preference; keep in mind that using less juice may also slow down how firmly the filling sets, so a slightly longer chill time may be needed. On the other hand, if you love a pucker-worthy lemon dessert, adding a touch more juice, along with some fresh lemon zest whisked in, intensifies both the tartness and the citrus aroma without changing the basic method at all. Tasting and carefully adjusting the balance before the filling goes into the crust is always far easier than trying to fix the flavor after the pie has already set completely in the refrigerator.
Working With Different Crust Types
A classic graham cracker crust is the traditional match for this filling, but this recipe is flexible enough to work with other prepared crusts if you’d like to switch things up. A shortbread cookie crust brings a slightly richer, buttery flavor that pairs nicely with the bright lemon filling, while a vanilla wafer crust leans a little sweeter and softer in texture. Whichever crust you choose, make sure it’s fully cooled if it was baked, since pouring the filling into a still-warm crust can cause it to set unevenly, softening the crust more than intended and affecting the overall texture of the finished pie once fully chilled.
A Note on Serving Temperature
This pie is meant to be served cold, straight from the refrigerator, since the filling is at its firmest and cleanest to slice right after chilling. If it sits out at room temperature for too long before serving, particularly on a warm day, the filling can start to soften noticeably, making it harder to cut clean slices and causing the texture to feel a bit looser on the fork. For a gathering, it’s worth keeping the pie refrigerated until just before it’s time to serve, then slicing and plating it quickly and carefully so each individual piece holds its clean shape all the way from the pan to the table.
Common Questions
Can I use bottled lemon juice instead of fresh?
Yes, though fresh juice gives a brighter flavor and the most reliable thickening; if using bottled, look for a 100% pure juice with no added preservatives.
Why didn’t my pie set firm enough?
It likely needs more chill time. Give it a few extra hours, or overnight, before slicing again.
Can I make my own graham cracker crust?
Yes, a homemade graham crust works just as well as a store-bought one; just make sure it’s fully set or baked and cooled before adding the filling.
Can I freeze this pie?
It’s not recommended, since the dairy-based filling can separate slightly once thawed, affecting the texture.
Can I use lime juice instead of lemon?
Yes, swapping in lime juice turns this into a classic key lime pie using the same technique and ratios.
How long does this pie keep?
Store it covered in the refrigerator for up to 4 days for the best texture and flavor.
Can I double this recipe?
Not in a single pie crust; for a bigger batch, make two pies in two separate crusts rather than doubling the filling in one pan.
3-Ingredient Creamy Lemon Cream Pie turns a can of condensed milk, fresh lemon juice, and a store-bought crust into a bright, creamy pie with real citrus flavor in every slice. Whisk, pour, chill, and slice — that’s the entire process, and the result is a wonderfully refreshing, genuinely bright no-bake dessert that’s ready with just a few hours of easy, hands-off chilling time and almost no cleanup afterward.